Events

The so-called events can be used to trigger various functions via the connected hardware (e.g. iSHearo, buttons). If the corresponding hardware component is pressed, a trigger is activated in the software, which can be recognised and processed in the events.
Creating a new event
- To create a new event, click the Add Event button, the empty event then appears in the list below.
- The input fields marked with * are mandatory fields and must be filled in.
- The delay has a default value of 0 ms, this time specifies after how many milliseconds the event should start as soon as the trigger is activated. (Example: 5000ms = event starts 5 seconds after the trigger is activated. This has the advantage, for example, that the user has enough time to bring the iSHearo to their ear)
Input states
- You can open the list of possible triggers in the drop-down menu of an event.
- The trigger is given by the corresponding hardware component:

-
The numbers 1-8 stand for the respective GPIO pins of the hardware (see Settings, GPIO states).
-
A hardware component is connected to each pin (e.g. iS-Hearo or button)
-
When the iS-Hearo is removed from its mounting (magnet), the software receives an Input opened signal and triggers the specified event via the trigger.
-
Not every connected hardware component has the NC (normally closed) status - the information on the statuses should be found in the corresponding hardware documentation.
-
Accordingly, the input should be set correctly (Normally opened or normally closed).
Delay
- A delay is defined for the event (optional, default 0ms) so that the stored function is not called directly after the trigger is triggered.
- A delay should be used, for example, when playing a playlist or a track so that the user has time to bring the iS-Hearo to their ear.
- When using ‘Mute’ or ‘Unmute’ etc., no delay should be stored so that the user does not have to wait for the action.
Action
- When an event is triggered, it accesses the stored function.

The following functions are available to the user:
- Stop Playback = Stops the current playback (should always be set as the end event if an audio was played previously).
- Mute** = Mutes the audio.
- Unmute** = deactivate the mute function.
- Next Playlist = Plays the next playlist in the specified order.
- Next Title** = Plays the next track within the specified playlist (‘Play Playlist’ event required).
- Play Playlist** = Plays the playlist selected in the next step.
- Play Track** = Plays the track selected in the next step.
- Pause** = Pauses playback
- Resume** = Resumes playback after ‘Pause’.
- Volume Up = Increases the global volume.
- Volume Down = Decreases the global volume.
Play Playlist
- Shows all created playlists for selection.
- The playlist must be selected.

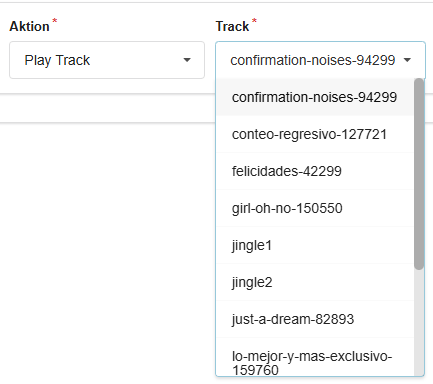
Play Track
- Shows all available tracks that have been uploaded via the "Files ’ tab, including jingles.
- The track to be played must be selected.
- The event is saved in the database with the Save button.
**From now on, the software reacts to the stored trigger.
Sorting
- The events can be reordered for personal interest, it has no effect on the triggering of actions!
- To change the order of the events, use the arrow keys again.
- Use the Save button to save the event in the database.
Deleting events
- If an existing event is to be deleted, this can be done on the right-hand side within the event block using the red X button.
Examples
Example 1: Audio Station in Loop
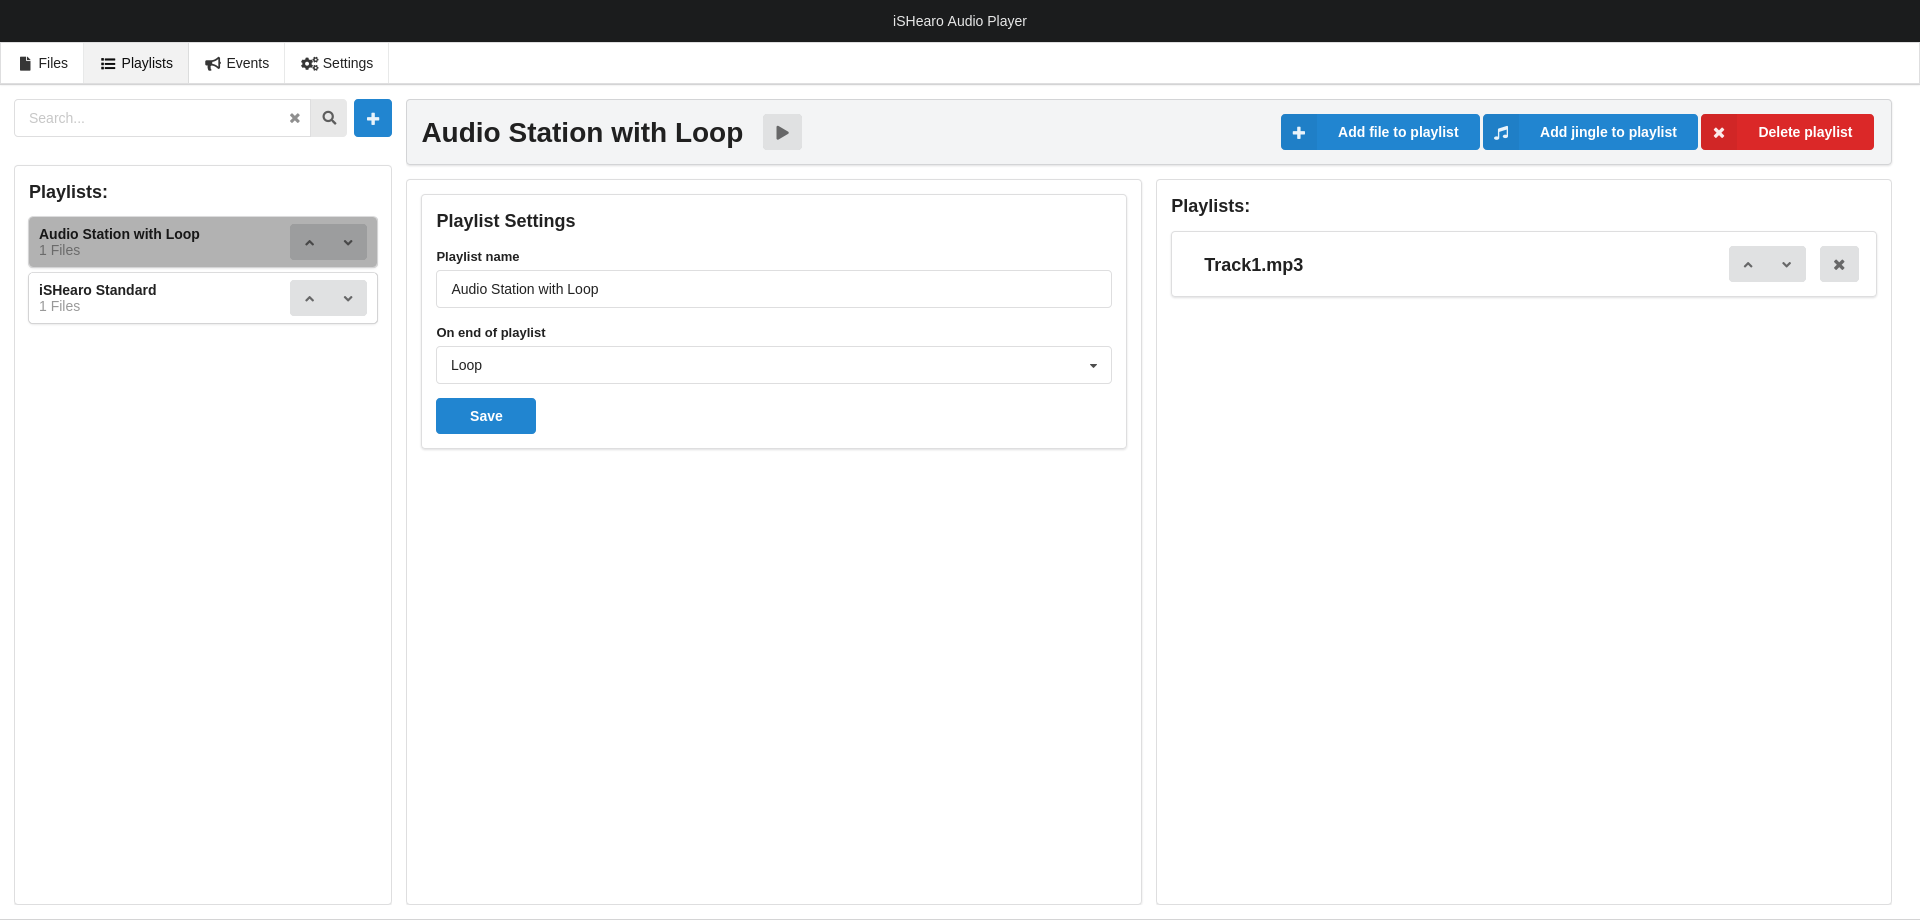 Create a playlist with one or several tracks. Define "Loop" as "On end of playlist" action.
Example 2: iSHearo Standard
Connect the reed contact of the iSHearo to the first input of the iSAudioPlayer.
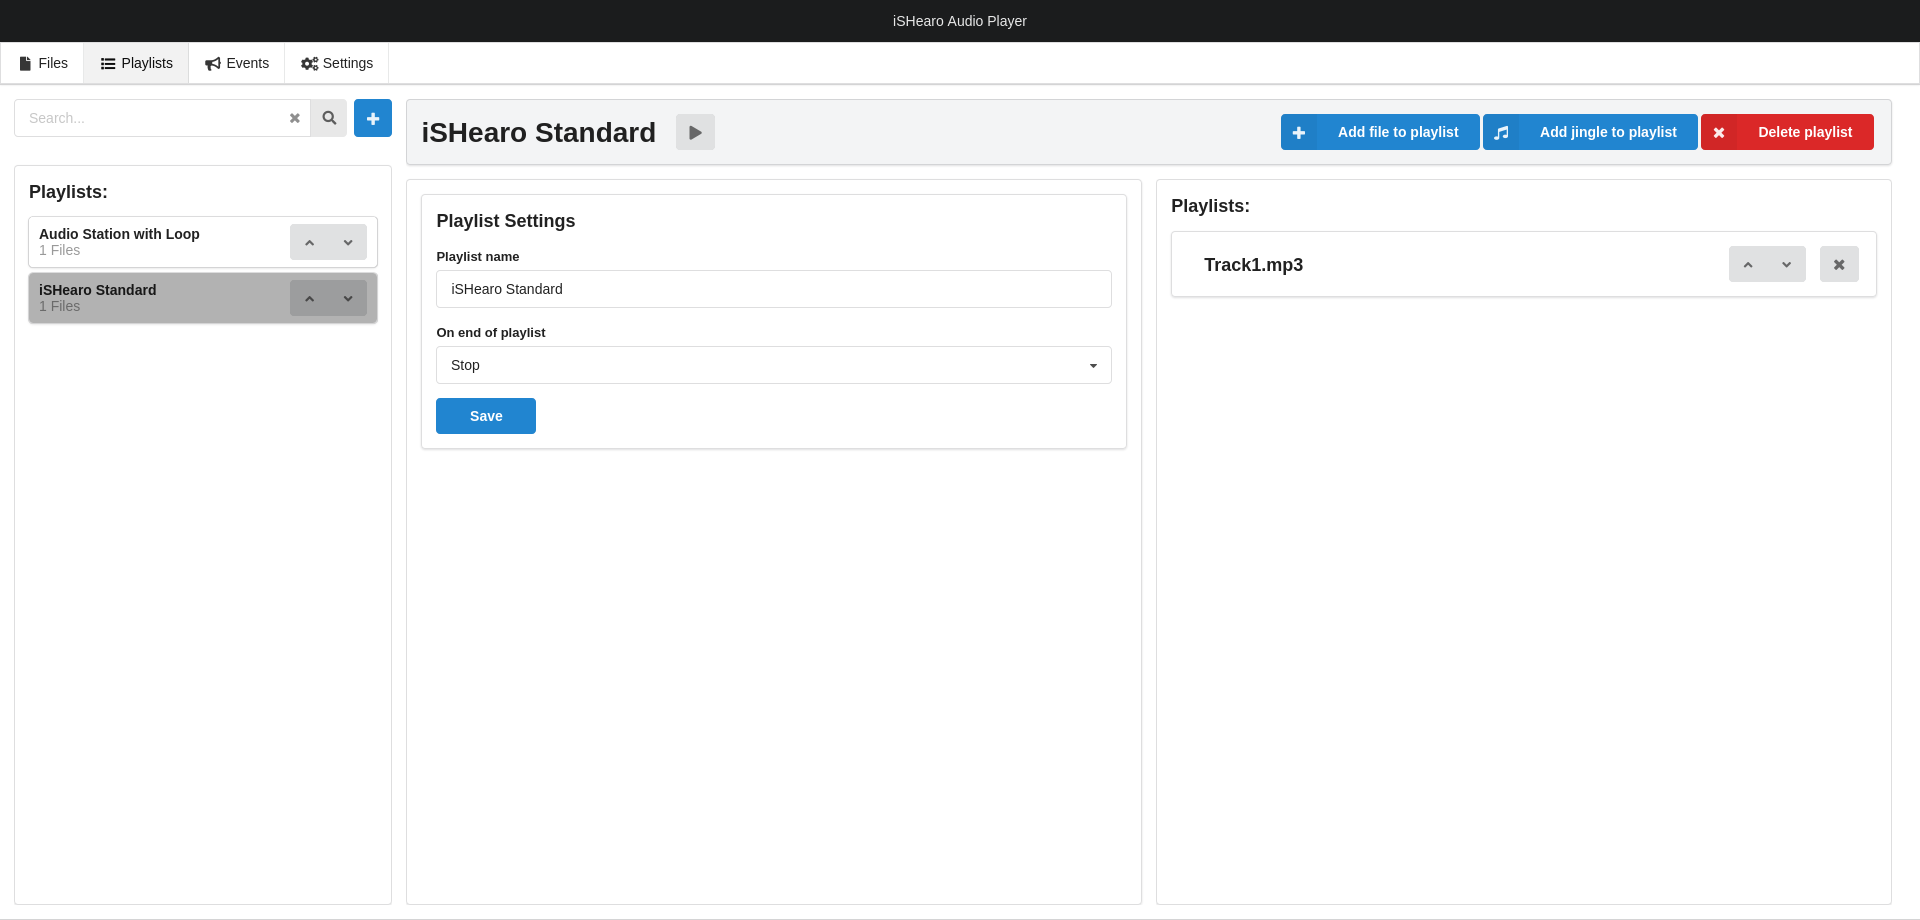 Create a playlist with one or several tracks. We recommend to define "Stop" as "On end of playlist" action.
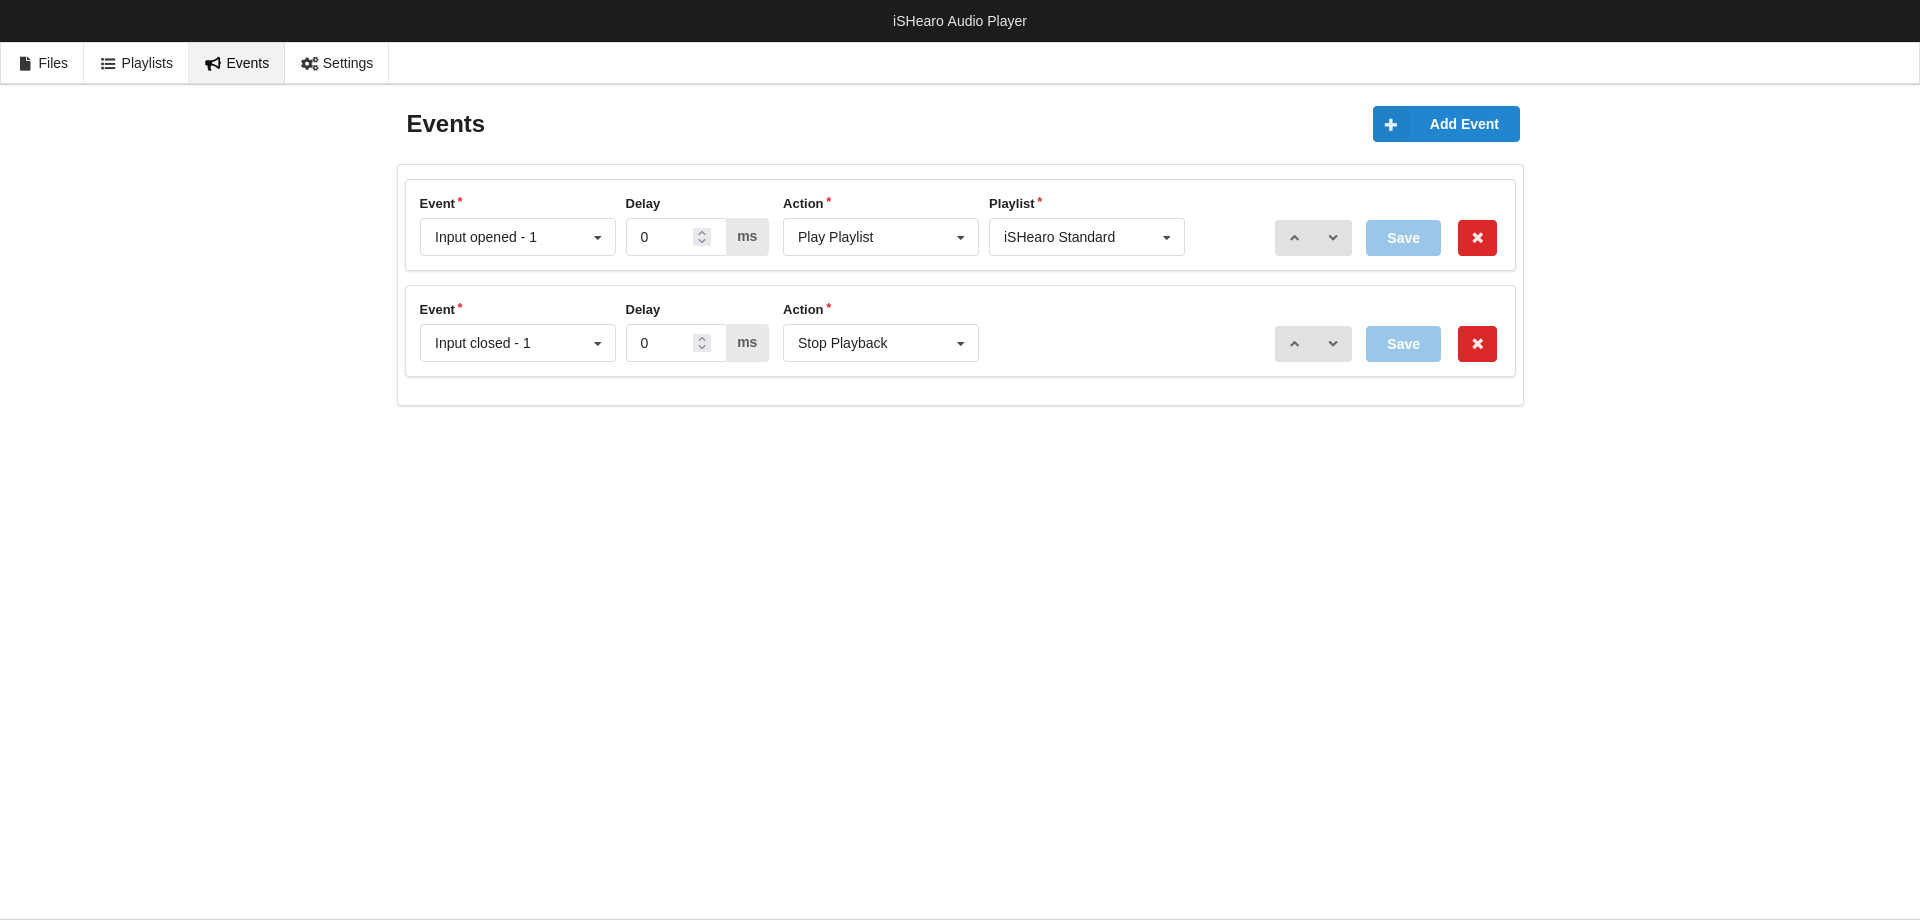 Switch to the "Events" tab.
When the iSHearo is picked up from its magnetic wall bracket, the reed sensor will open. So on the event "Input opened - 1" define an action to start your playlist.
Switch to the "Events" tab.
When the iSHearo is picked up from its magnetic wall bracket, the reed sensor will open. So on the event "Input opened - 1" define an action to start your playlist.
When the iSHearo is put back to the bracket, the reed sensor will close. Create a second event to stop playback after the "Input closed - 1" event.
In result the sound will be started when you put the iSHearo next to your ear, and the sound will stop when you put the headphone back to the wall.
Example 3: iSHearo with integrated language button
Connect the reed contact of the iSHearo to the first input of the iSAudioPlayer. Connect the integrated button to the second input.
Per language create a playlist with a language Jingle as first track and one or several main tracks. We recommend to define "Stop" as "On end of playlist" action.
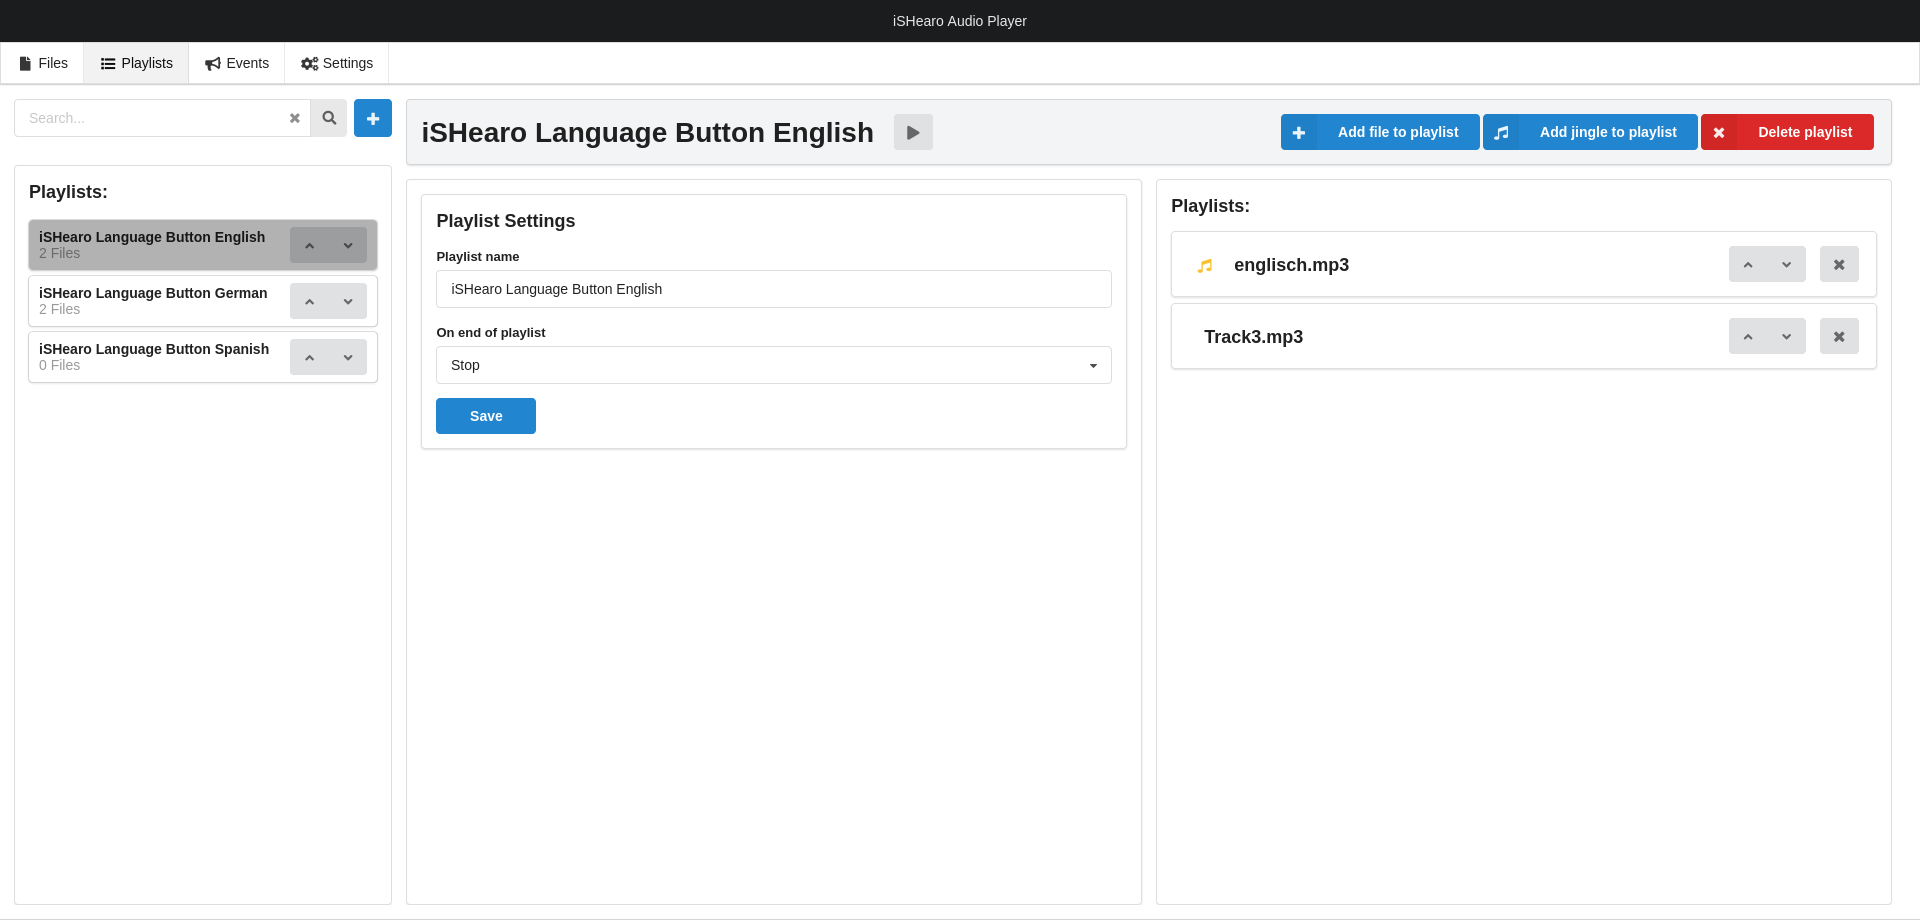 English Playlist with English jingle and main track.
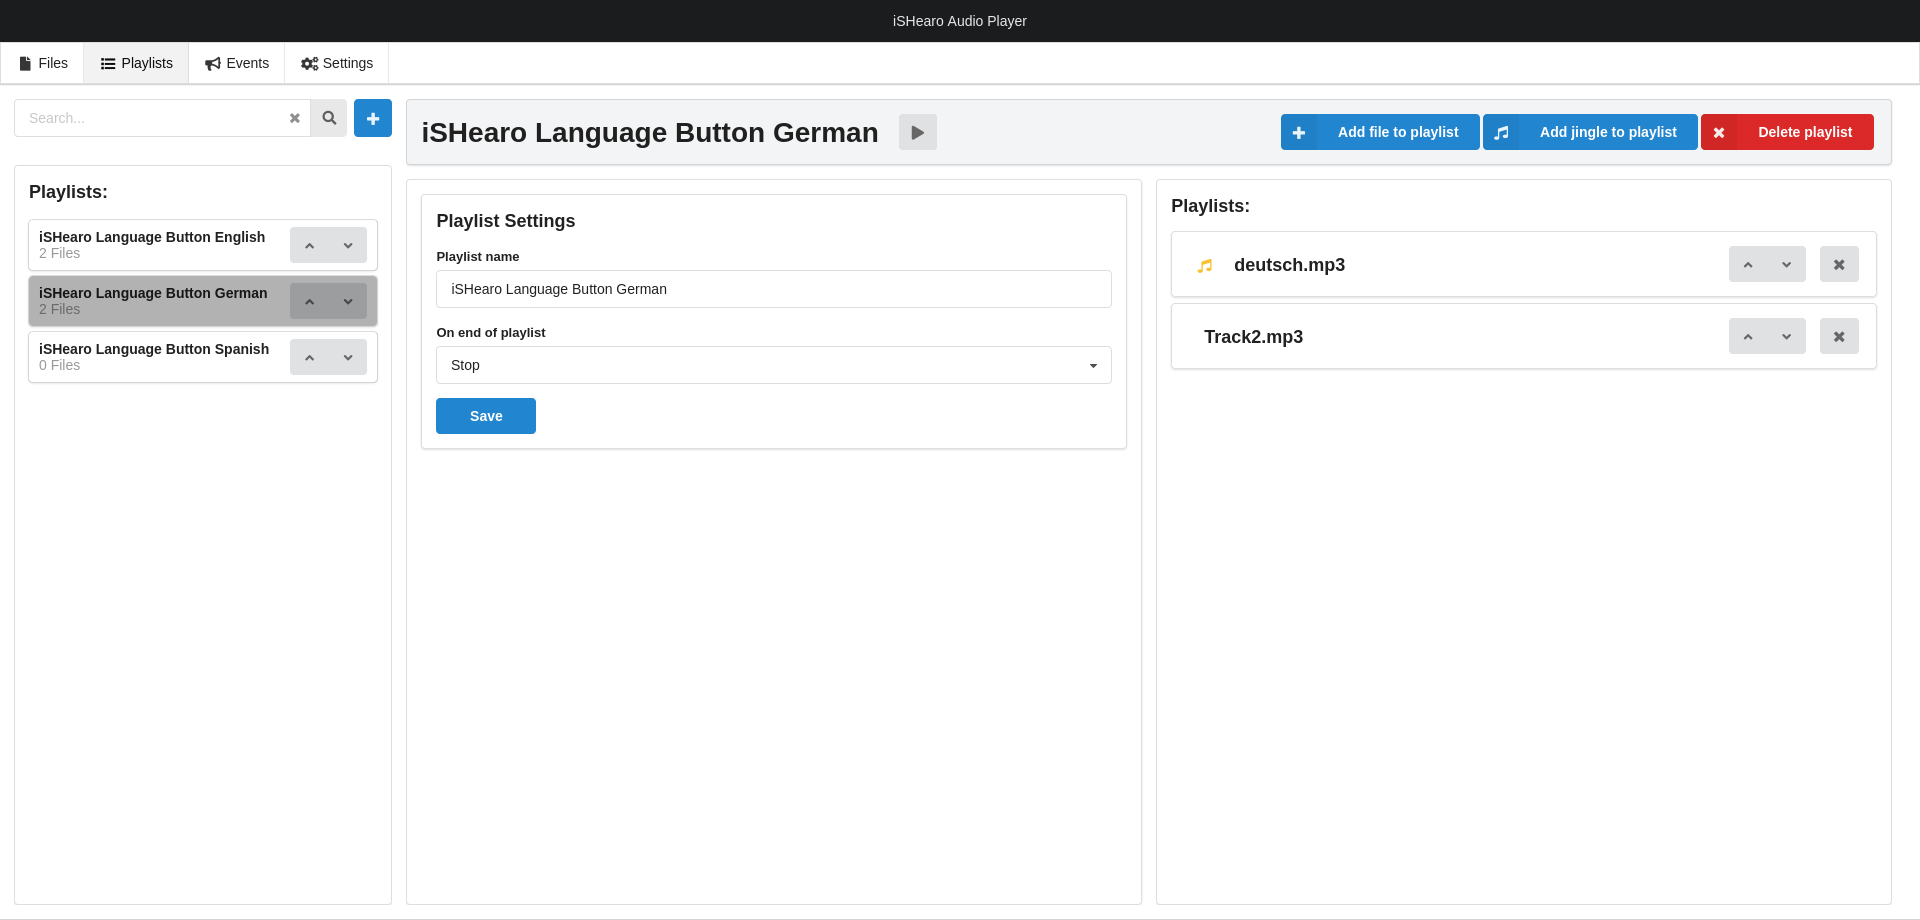 German Playlist with German jingle and main track.
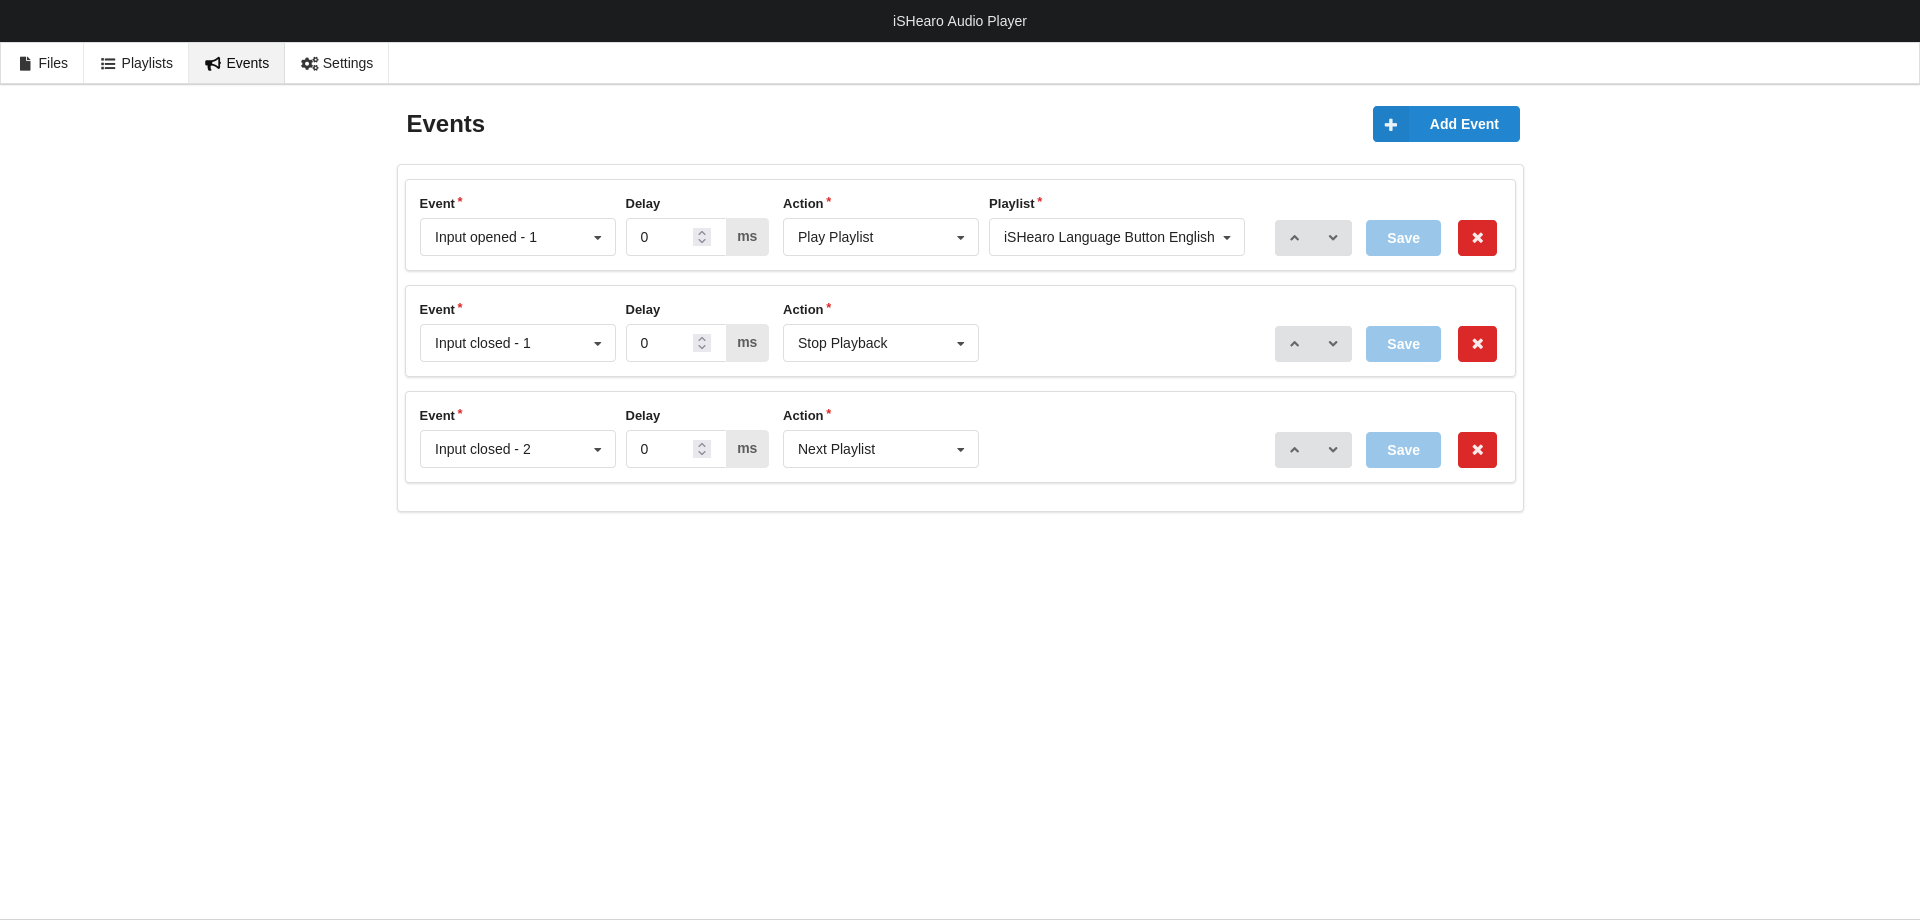 Switch to the "Events" tab.
On the event "Input opened - 1" define an action to start your default playlist, in this case the English playlist.
When the iSHearo is picked up from its magnetic wall bracket, the reed sensor will open and the default playlist will start.
Switch to the "Events" tab.
On the event "Input opened - 1" define an action to start your default playlist, in this case the English playlist.
When the iSHearo is picked up from its magnetic wall bracket, the reed sensor will open and the default playlist will start.
Create a second event to stop playback after the "Input closed - 1" event. When the iSHearo is put back to the bracket, the reed sensor will close and the audio will stop in any case.
Create a third event for the language button at input 2. On the Event "Input closed - 2" define the action "Next Playlist". Every time the language button is pressed, the AudioPlayer will switch to the next language playlist.
As said before, when the iSHearo is put back to the bracket, the audio will stop.