Media Files
This page has been automatically translated and has not been reviewed in detail yet. Therefore, the translation might not be completely accurate.

Add content
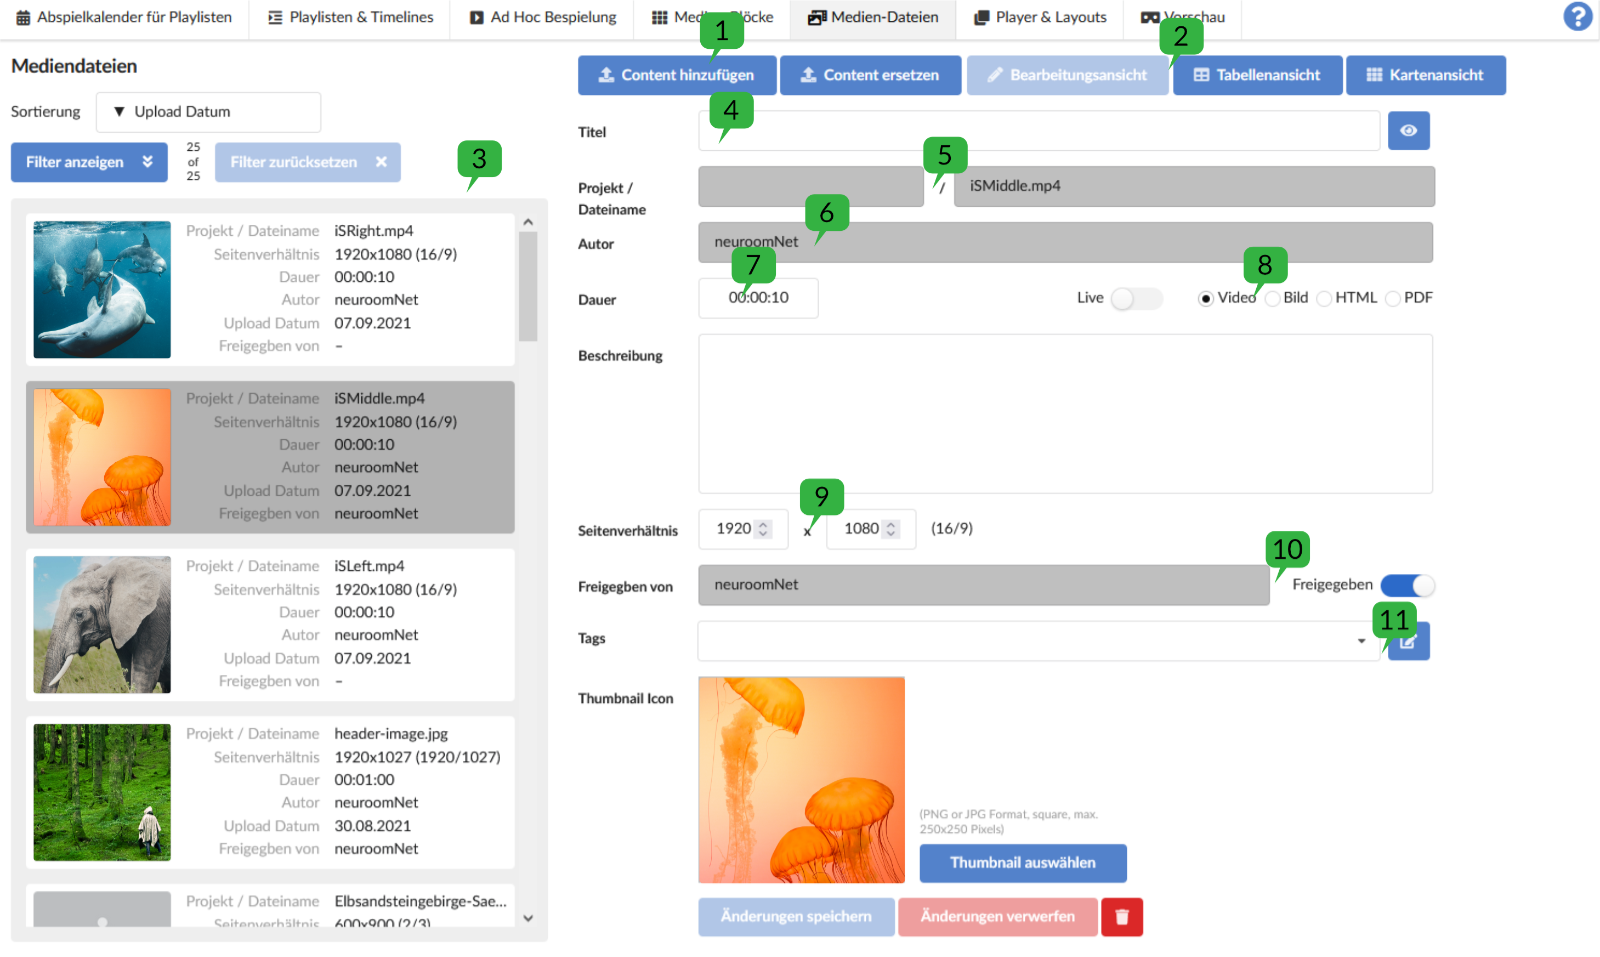
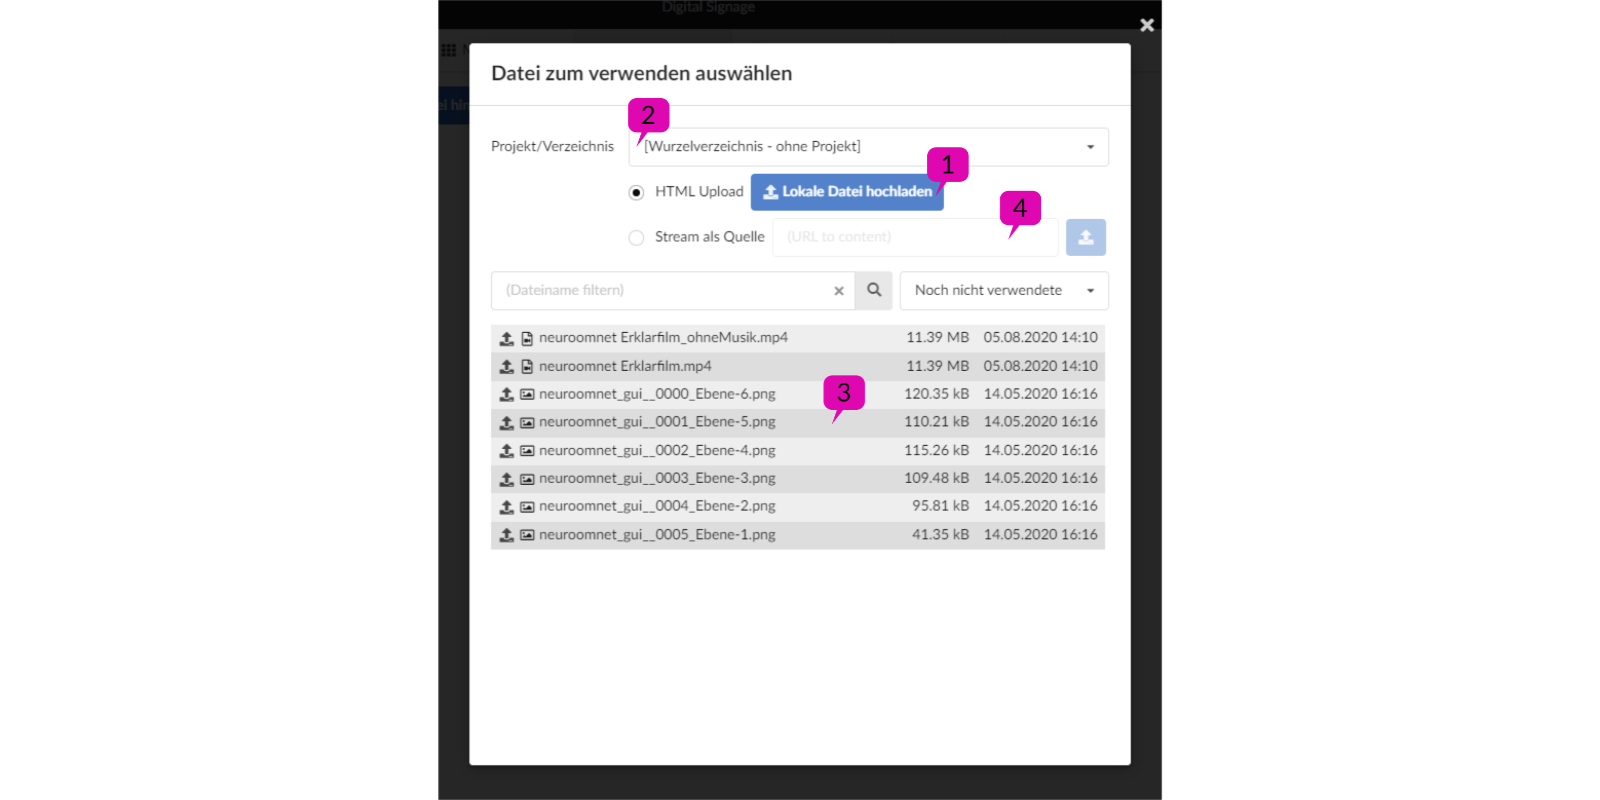
The 'Add file' button opens a dialog 1
There are several ways to add new media files to the system. First, upload files via HTTP as we know from browser applications 1.
This is not recommended for many and large files.

Import directory as project attribute 2
Furthermore, the system knows a root directory in a network share (folder with corresponding shares). You can add files from the root directory or the first level of subfolders. Since the subdirectories can be divided into projects by naming them, this 'project' is added as an attribute to a media file. You can also search/filter accordingly.
If you select the root directory (i.e. not a project), the attribute remains empty.
If you now select a project/directory, the files from this directory will be displayed in a list 3. By clicking on the small upload icon in front of the file name, the file is added to the system. As I said, if the file is in a subfolder, the folder name is used as a project attribute.
4 Another way to integrate video sources into the system is streams. To do this, you specify a URL as the source. However, not all players support stream playback.
A notice!
A copy is always created for files that are added to the system. This has the advantage that files can be deleted from the projects/directories without this affecting a playlist or a current broadcast. However, this also results in double the storage requirement.
Views 2
At the top right there are three buttons that can be used to select different views. In the 'edit view', information about a media file can be edited or added. The two views 'Table View' and 'Card View' offer an alternative selection for a media file. If you select a media file in one of the two views, the view automatically switches to the 'Editing view'.
In the editing view 3
On the left side in the 'Media Files' menu is the list of all media files that are already known to the system. Each media file is represented by a card, which shows various information about the file in addition to a preview image.
If you change settings for a file, they will only be applied when you press the 'Save changes' button. They are also updated on the map.
A notice!
The grayed out fields are filled automatically when new content is added, but cannot be changed, such as the file name. There are other fields that are also filled automatically but can still be changed.
Replace file
Next to the ‘Add File’ button is the ‘Replace File’ button. This function is recommended if the media file has already been used in various Bocks or playlists. If a new file is selected here, the corresponding file will also be replaced in all blocks/playlists. This does not apply to ongoing playback.
Media attributes
Attribute ‘Title’ 4
As long as no title has been assigned, the project or file name is displayed on the file card.
File Preview
Next to the title attribute is the preview icon to view the currently selected media file in a new browser tab.
Attribute ‘Project / Filename’ 5
The ‘Filename’ field, as the name suggests, contains the name of the file. The ‘Project’ field contains the name of the subfolder of the root directory.
Attribute ‘Author’ 6
If you add a media file, the currently logged in user is entered as the author.
Attribute ‘Duration’ 7
The length of a video is also automatically entered under ‘Duration’ when importing. However, the value can still be changed if the automation determines the wrong value due to incorrect decoder information.
A value can also be entered here for images. If you use the image in a block, the corresponding duration is adopted as the display length.
The duration is formatted in timecode, which means hours, minutes and seconds are each separated by two digits with a colon.
So 01:02:03 equals one hour, two minutes and three seconds
Attribute ‘Type’ 8
The type (video, image, HTML, PDF) is usually set accordingly when importing. The type can be filtered accordingly in lists. The ‘Video’ type has a ‘Don’t skip anything’ flag. This means that if this film is shown at a certain time of day (e.g. via Ad Hoc Player), the film will always be played from the beginning and not started in the middle.
A notice!
Not all formats are supported by all players.
Attribute ‘Description’
A text description can be added to the media files here.
Attribute ‘Aspect Ratio’ 9
The aspect ratio is automatically calculated from the resolution of the media file. When you later create a media block, you can set a preferred aspect ratio and when adding media files to the block, the system warns if the ratio is incorrect.
'Share' attribute 10
If you add a media file, sharing is not set by default. This means the file cannot be used for playback. If it is used in a block or a player, it will be ignored or skipped at play time. If the file is subsequently released, it will be displayed the next time it is played.
To share a file, you need the appropriate permission.
The name of the releaser is entered automatically. This is the currently logged in user.
Attribute ‘preview image’
An image can be added to each media file to represent the file in the file list. A JPG or a PNG with a maximum resolution of 250x250 pixels can be used for this.
Attribute ‘Tags’ 11
Each media file can be tagged with any number of tags. On the one hand, tags are used to filter files in the list view, but on the other hand they can also be used to generate content.
Blocks can be inserted into playlists, which automatically generate their content from the media files that contain the corresponding tags. A more detailed description of this can be found in the ‘Playlists & Timelines’ chapter.
Tags can be added via a dialog (Tag Editor), provided you have the appropriate rights.
Tag Editor
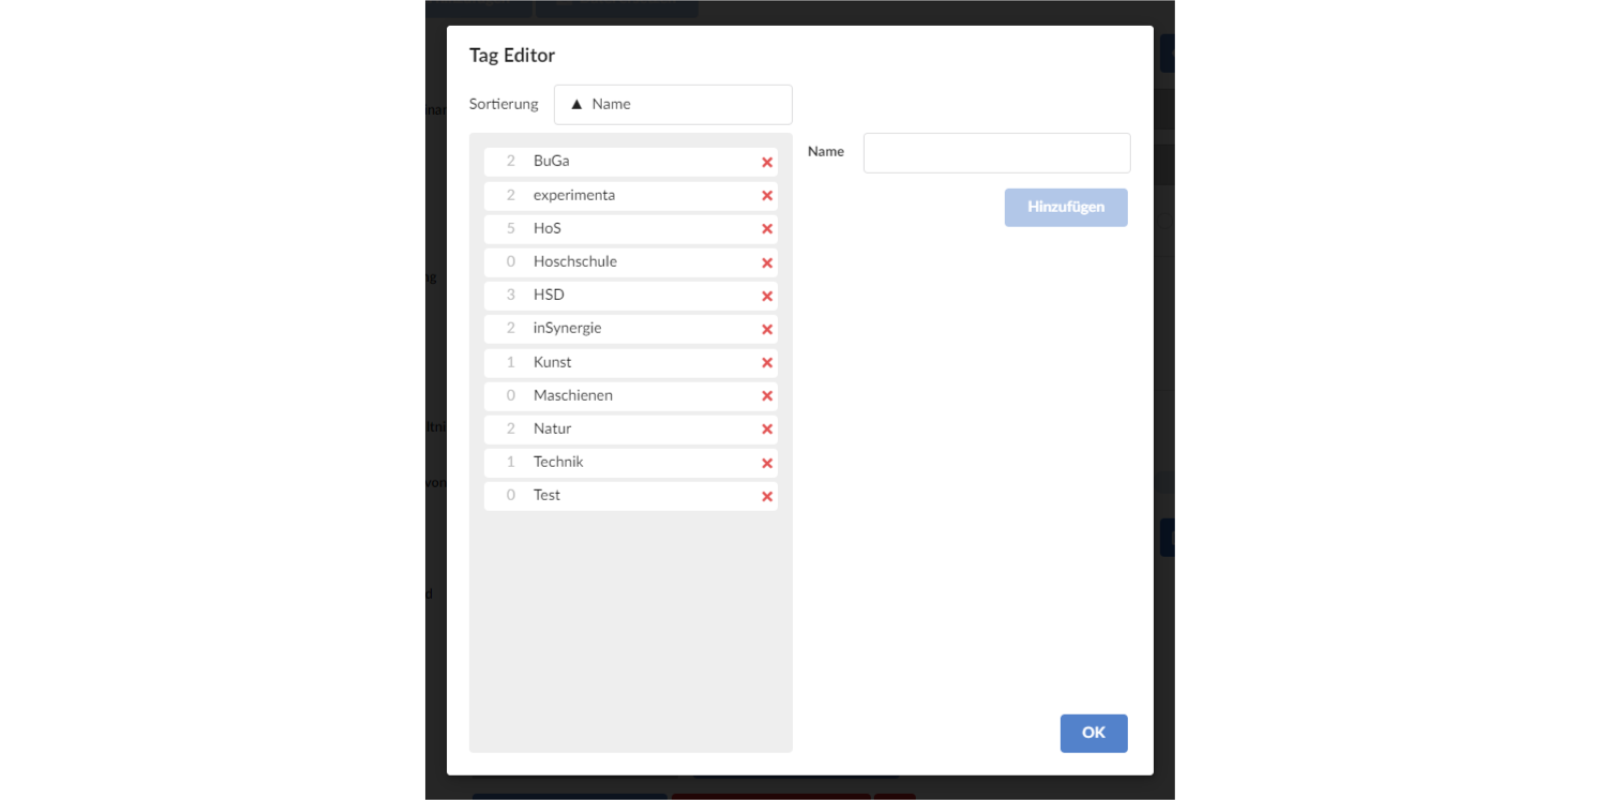
In the tag editor, the tags can be viewed in a list so that in case of doubt a tag is not created twice. On the other hand, new tags can also be added to the list using the 'Add' button.
The number to the left of the tag shows how many media files use the respective tag. The list can also be sorted by ‘use’.
If you want to delete a tag that is currently still in use, a warning will appear. If this is confirmed, the tag will also be removed from the corresponding media files.
