Security and certificates
This page has been automatically translated and has not been reviewed in detail yet. Therefore, the translation might not be completely accurate.
Today, networks such as the Internet (World Wide Web) and the intranet (local network/Wi-Fi) can no longer be imagined without Securing data connections. Almost everyone has heard the names of the protocols used for security. However, it is probably not clear to everyone what the difference is between SSL, TLS and HTTPS and what security properties these protocols have.
Why is a secure data connection useful?
Let's assume a user wants to navigate to an exhibit in NeuroomNet. When using a secured connection, this user benefits from the security properties of encrypted and secured communication. Without encryption, data that is transmitted is readable as plain text by anyone with access to the corresponding network. With the increasing spread of open (i.e. unencrypted) WLANs, the importance of HTTPS is increasing because it allows content to be encrypted regardless of the network used. Encryption makes it impossible for third parties to see, among other things, exactly which pages of a website were visited.
The use of certificates can ensure that no third-party manipulation of the content is possible during transmission and, for example, that false information about your company is not injected into your company website.
Install certificate on client computers
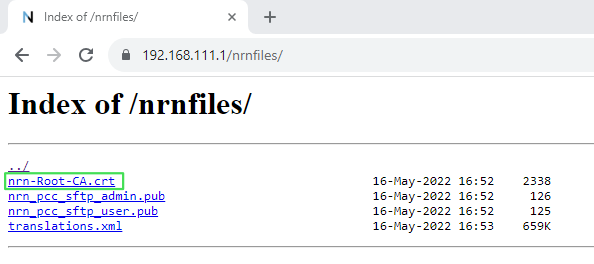
You can obtain the certificate with the ending .crt from your administrator or, from NeuroomNet version 2023.2, the certificate can be downloaded for installation at the NeuroomNet address with the extension /nrnfiles/.
Example:

Windows
Chrome and Edge use the system certificate store. The necessary certificates to access internal websites can be distributed under Windows via group policy (if a PKI is present). Otherwise the installation must be done manually.
Then load the root and sub (signing) certificates into the local computer certificate store with administrative rights.
-
Open mmc.exe as administrator
-
File>Add Snap-in>Certificates>Add>Computer Account>Next>Local Computer(...)>Finish>OK

-
Either install or import the certificate into “Trusted Root Certification Authorities”.
It should also work if the certificate is stored in the user store. The "automatic selection" of the storage where the certificate should be stored does not work reliably. It must be “Trusted Root Certification Authorities”.
Firefox usually has its own certificate store. However, access to the system memory can be activated via a configuration entry.
To do this, enter about:config in the address line, confirm the warning and search or filter the list of settings for the entry security.enterprise_roots.enabled. This can be switched by double-clicking. For the desired functionality it must be set to true. After this change, the certificates from the internal pages will be accepted (without restarting Firefox).
If you use the integrated certificate storage, the trust relationship for websites (possibly also emails, although this would more likely affect Thunderbird) must be activated in the properties in all parts of the chain (root CA, signing CA).
iOS
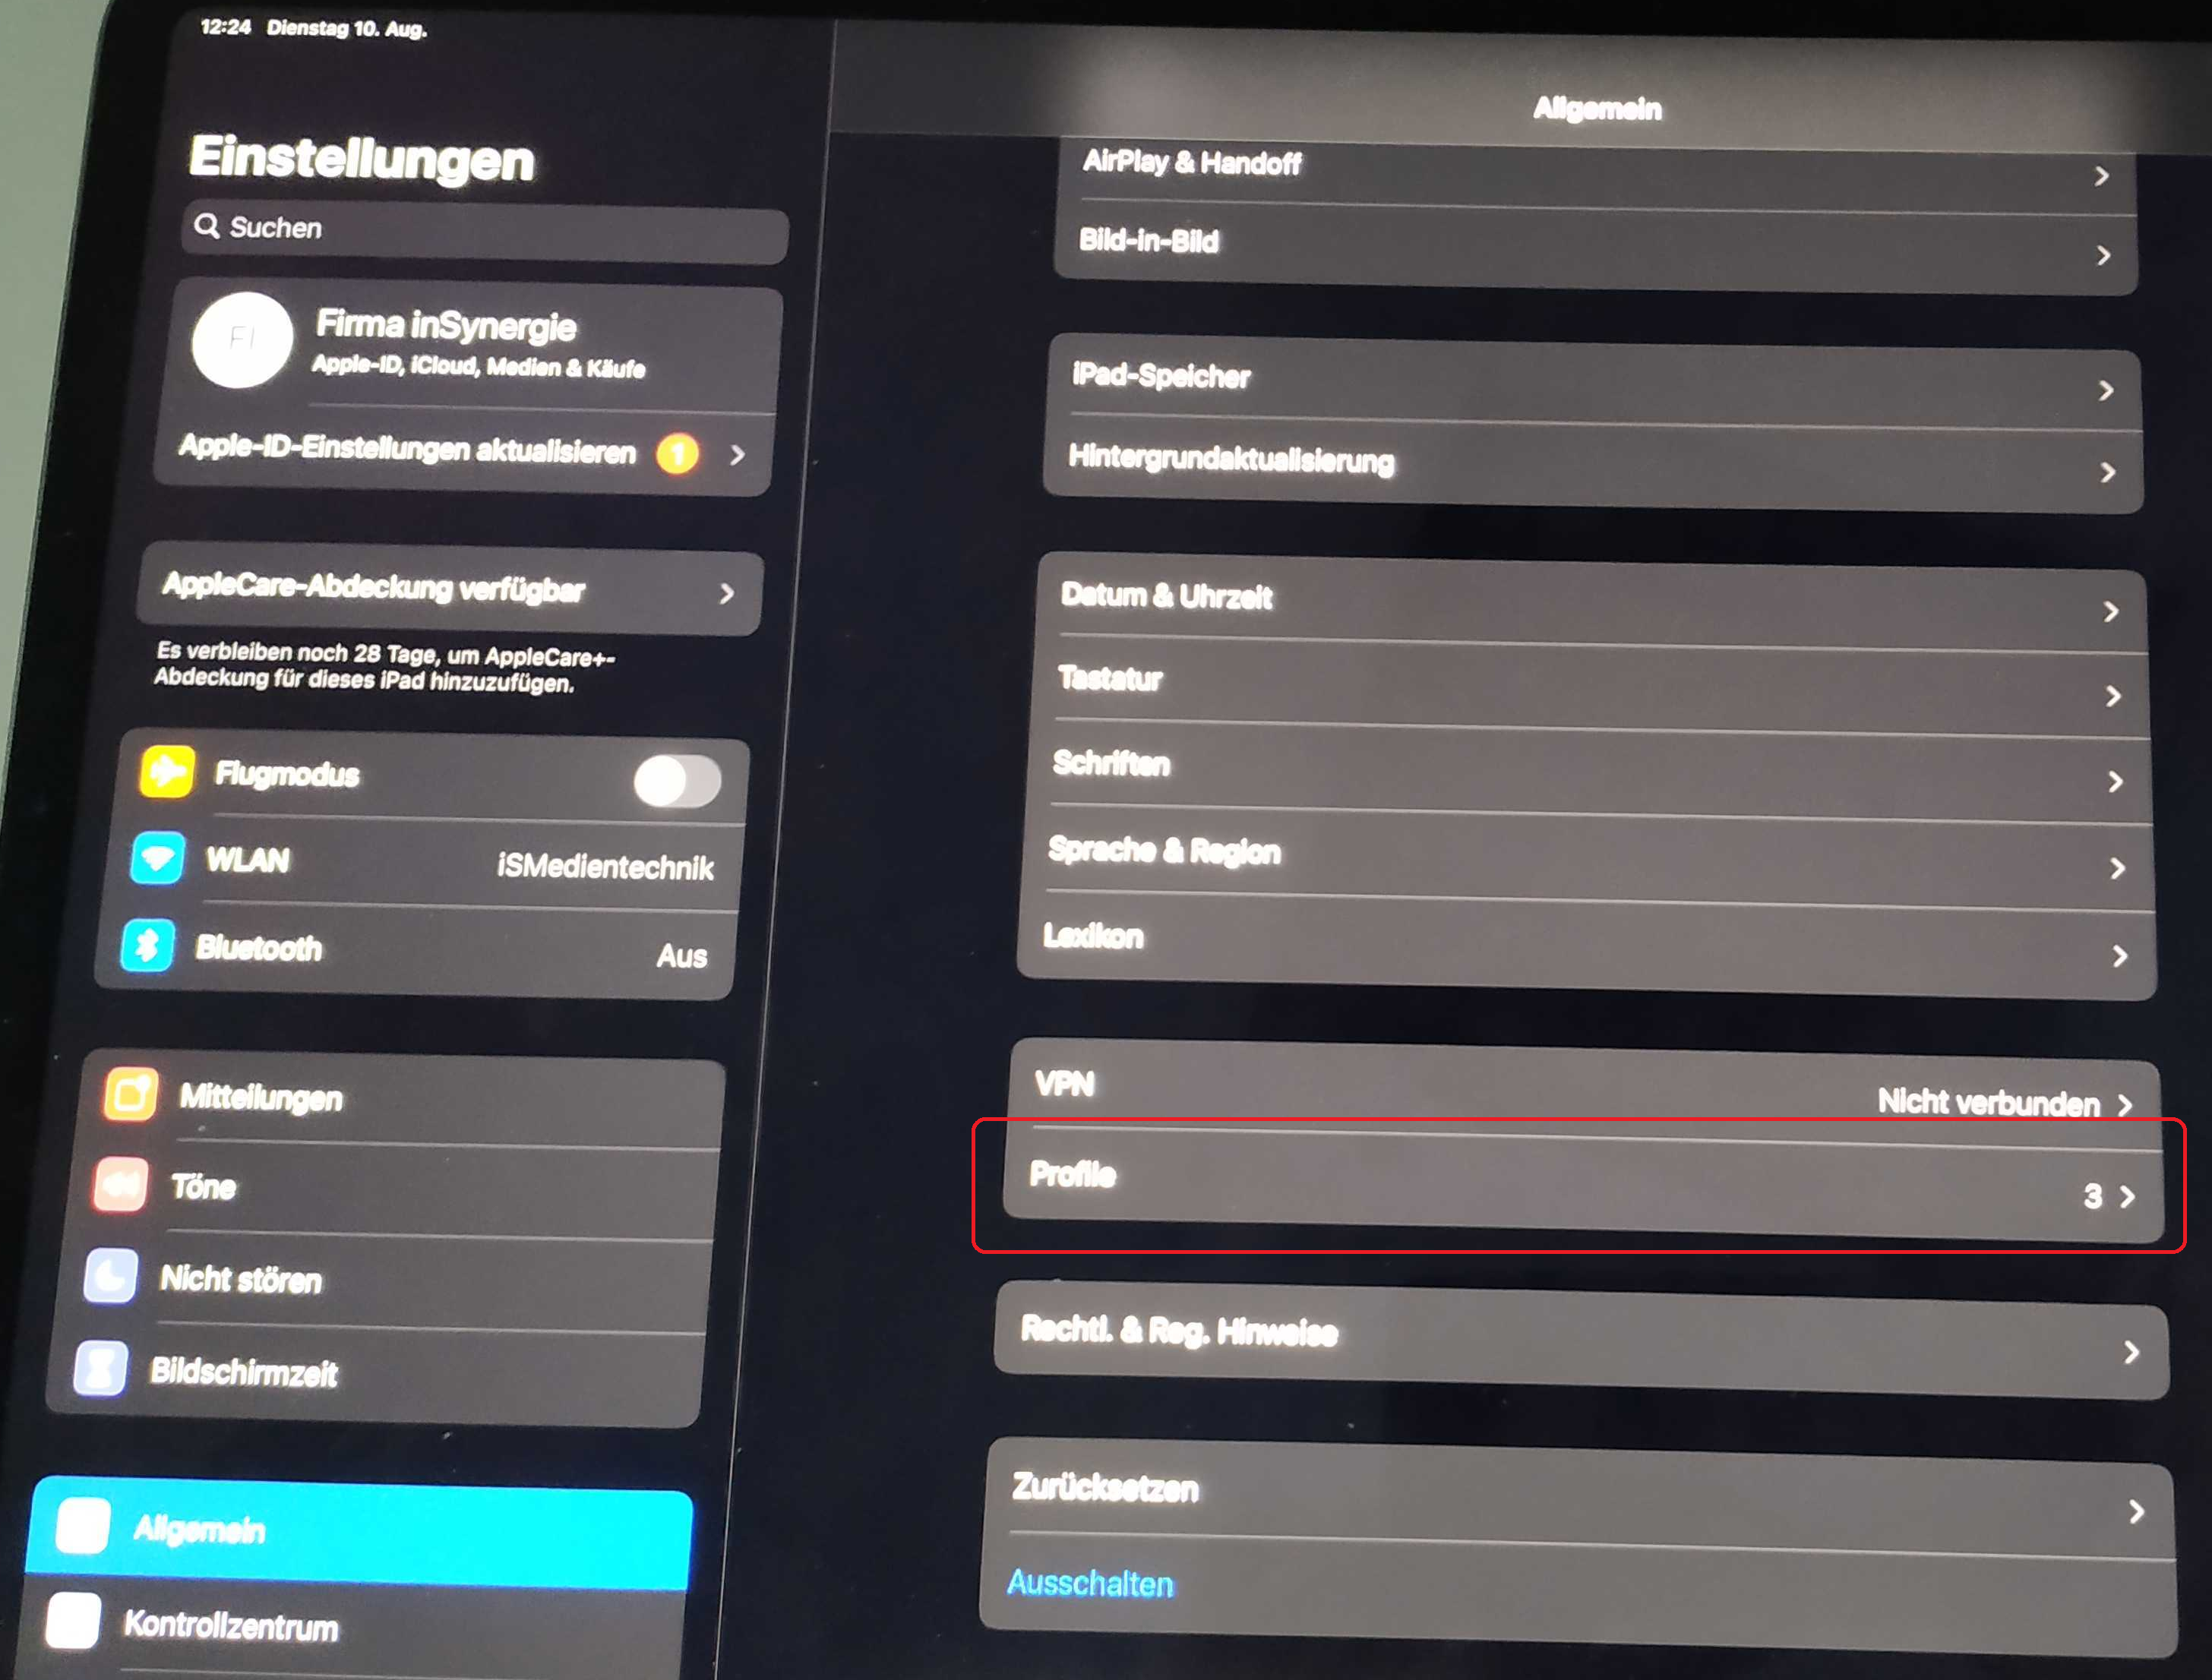
Certificates must be opened individually on iOS. You then have to install the loaded “profile” under Settings > General > Profiles.

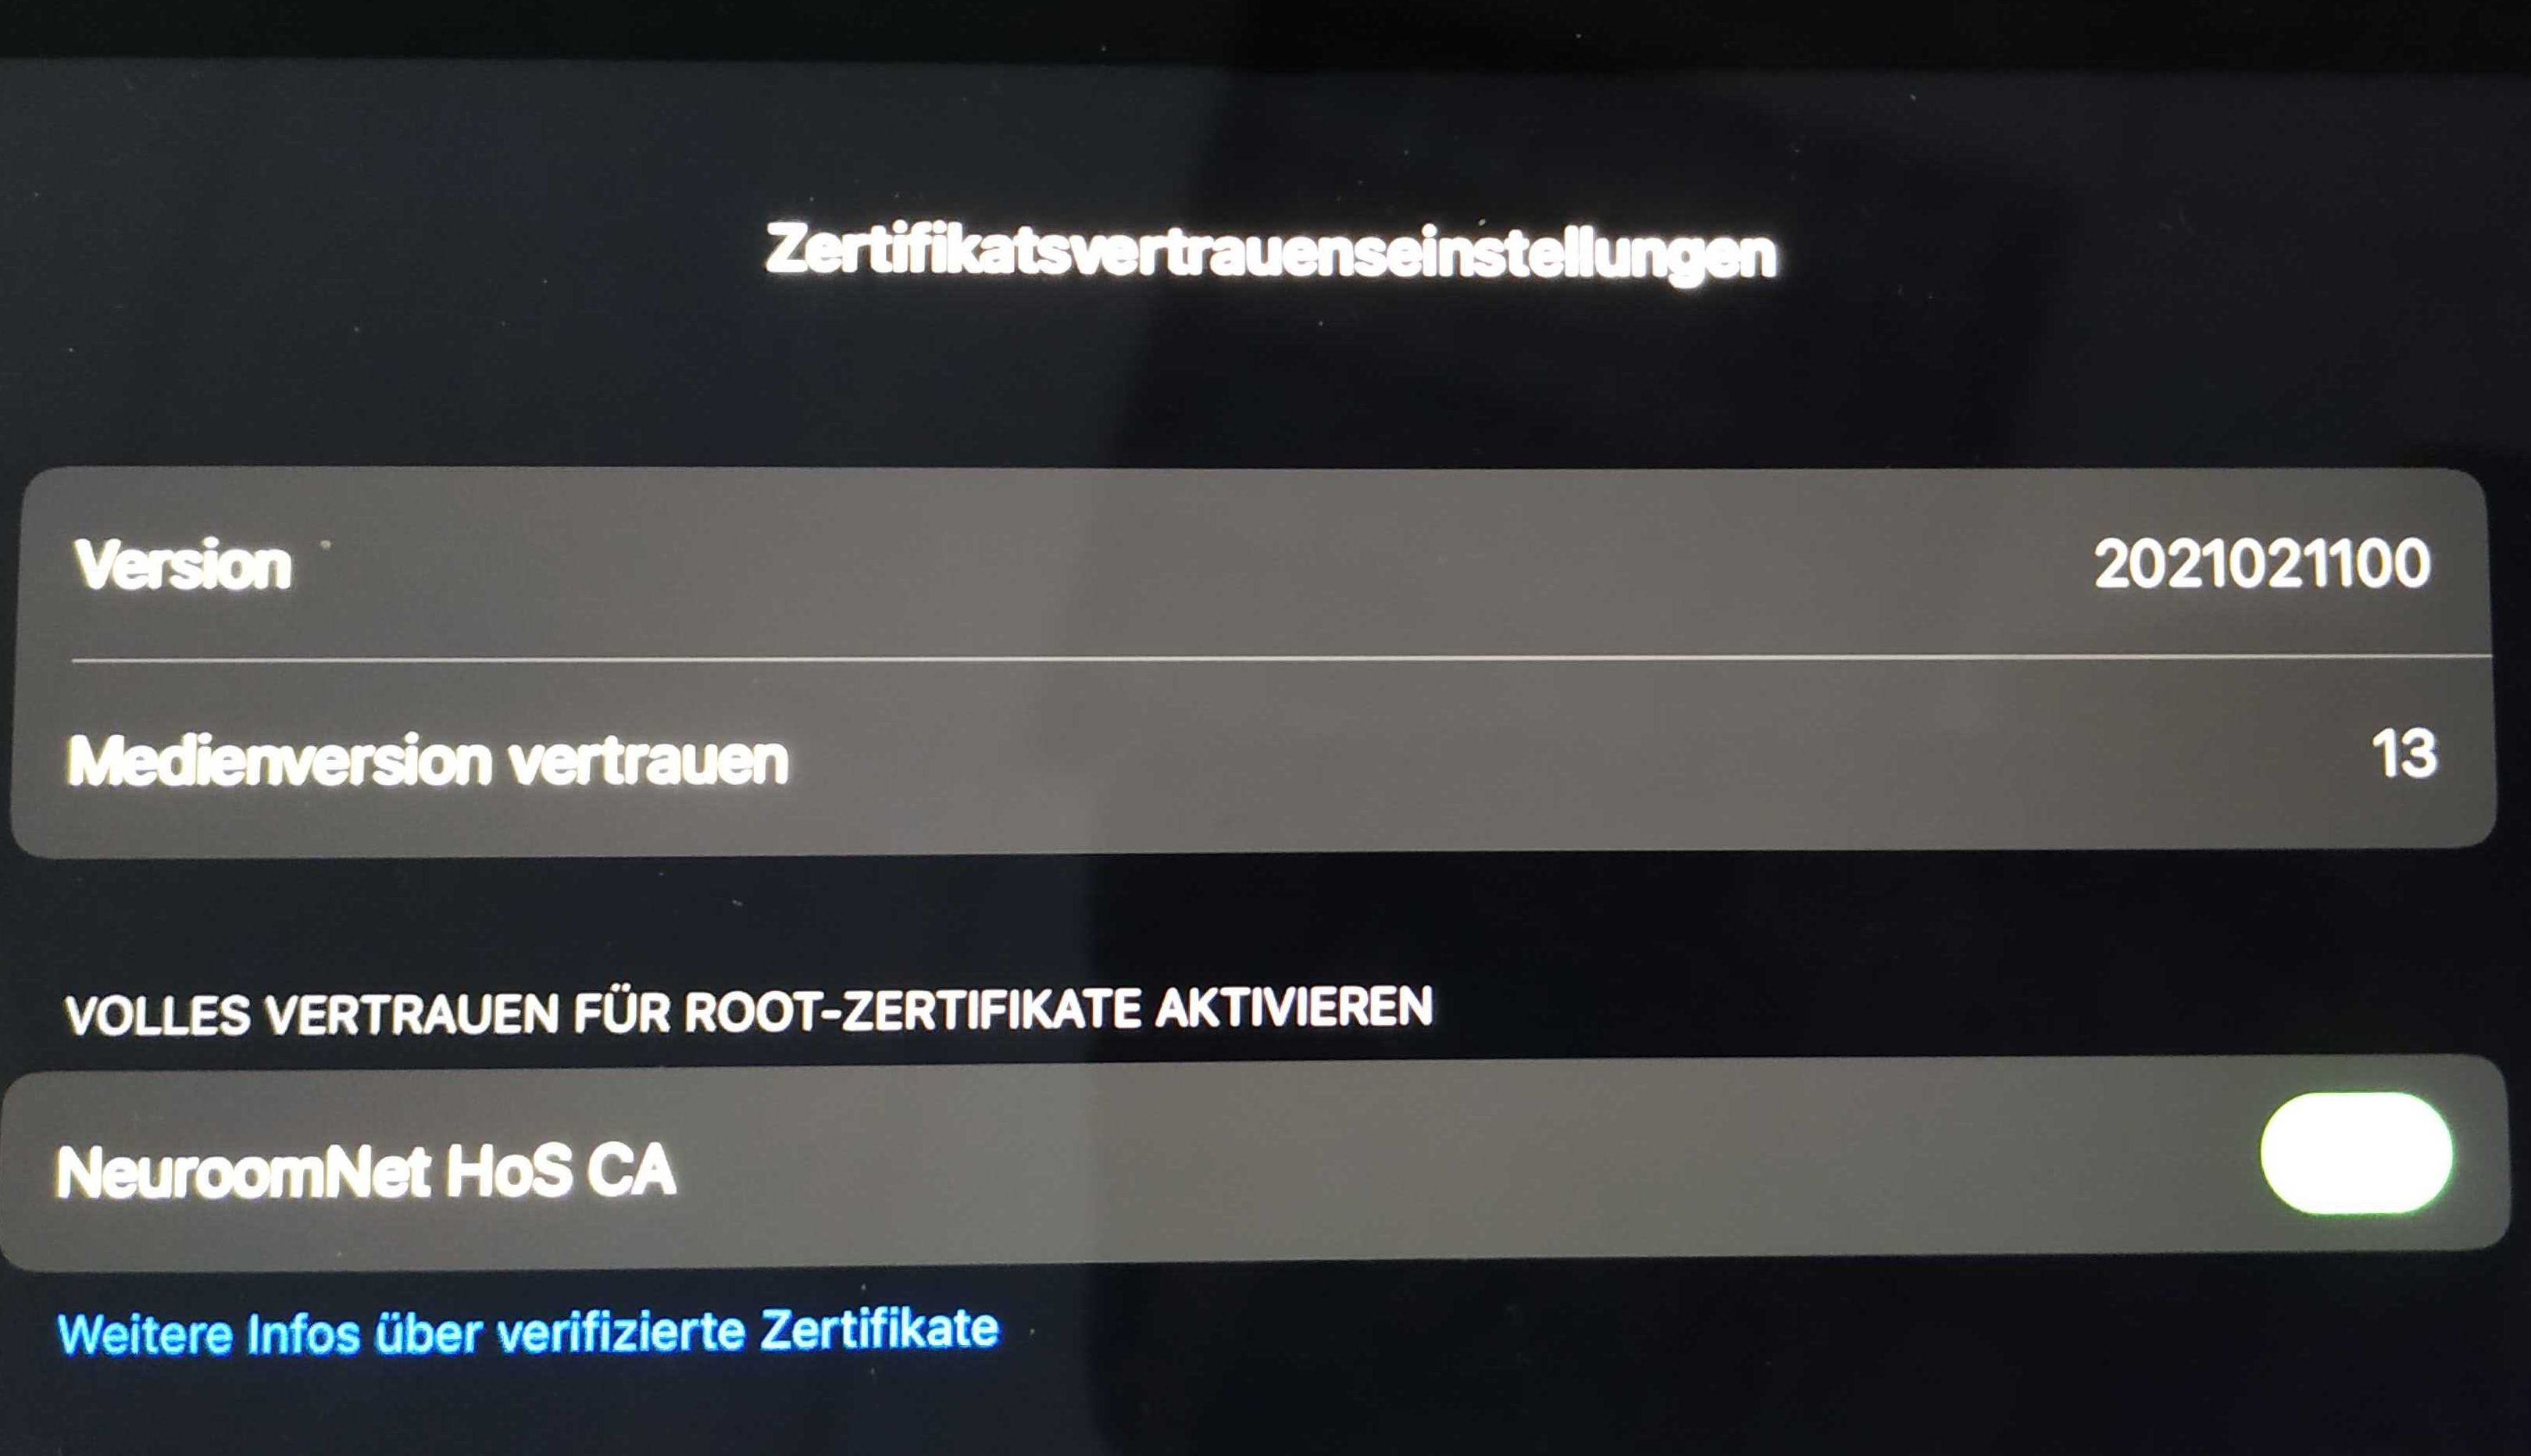
However, that is not enough to use WebSockets.
To do this you also have to tick the box.
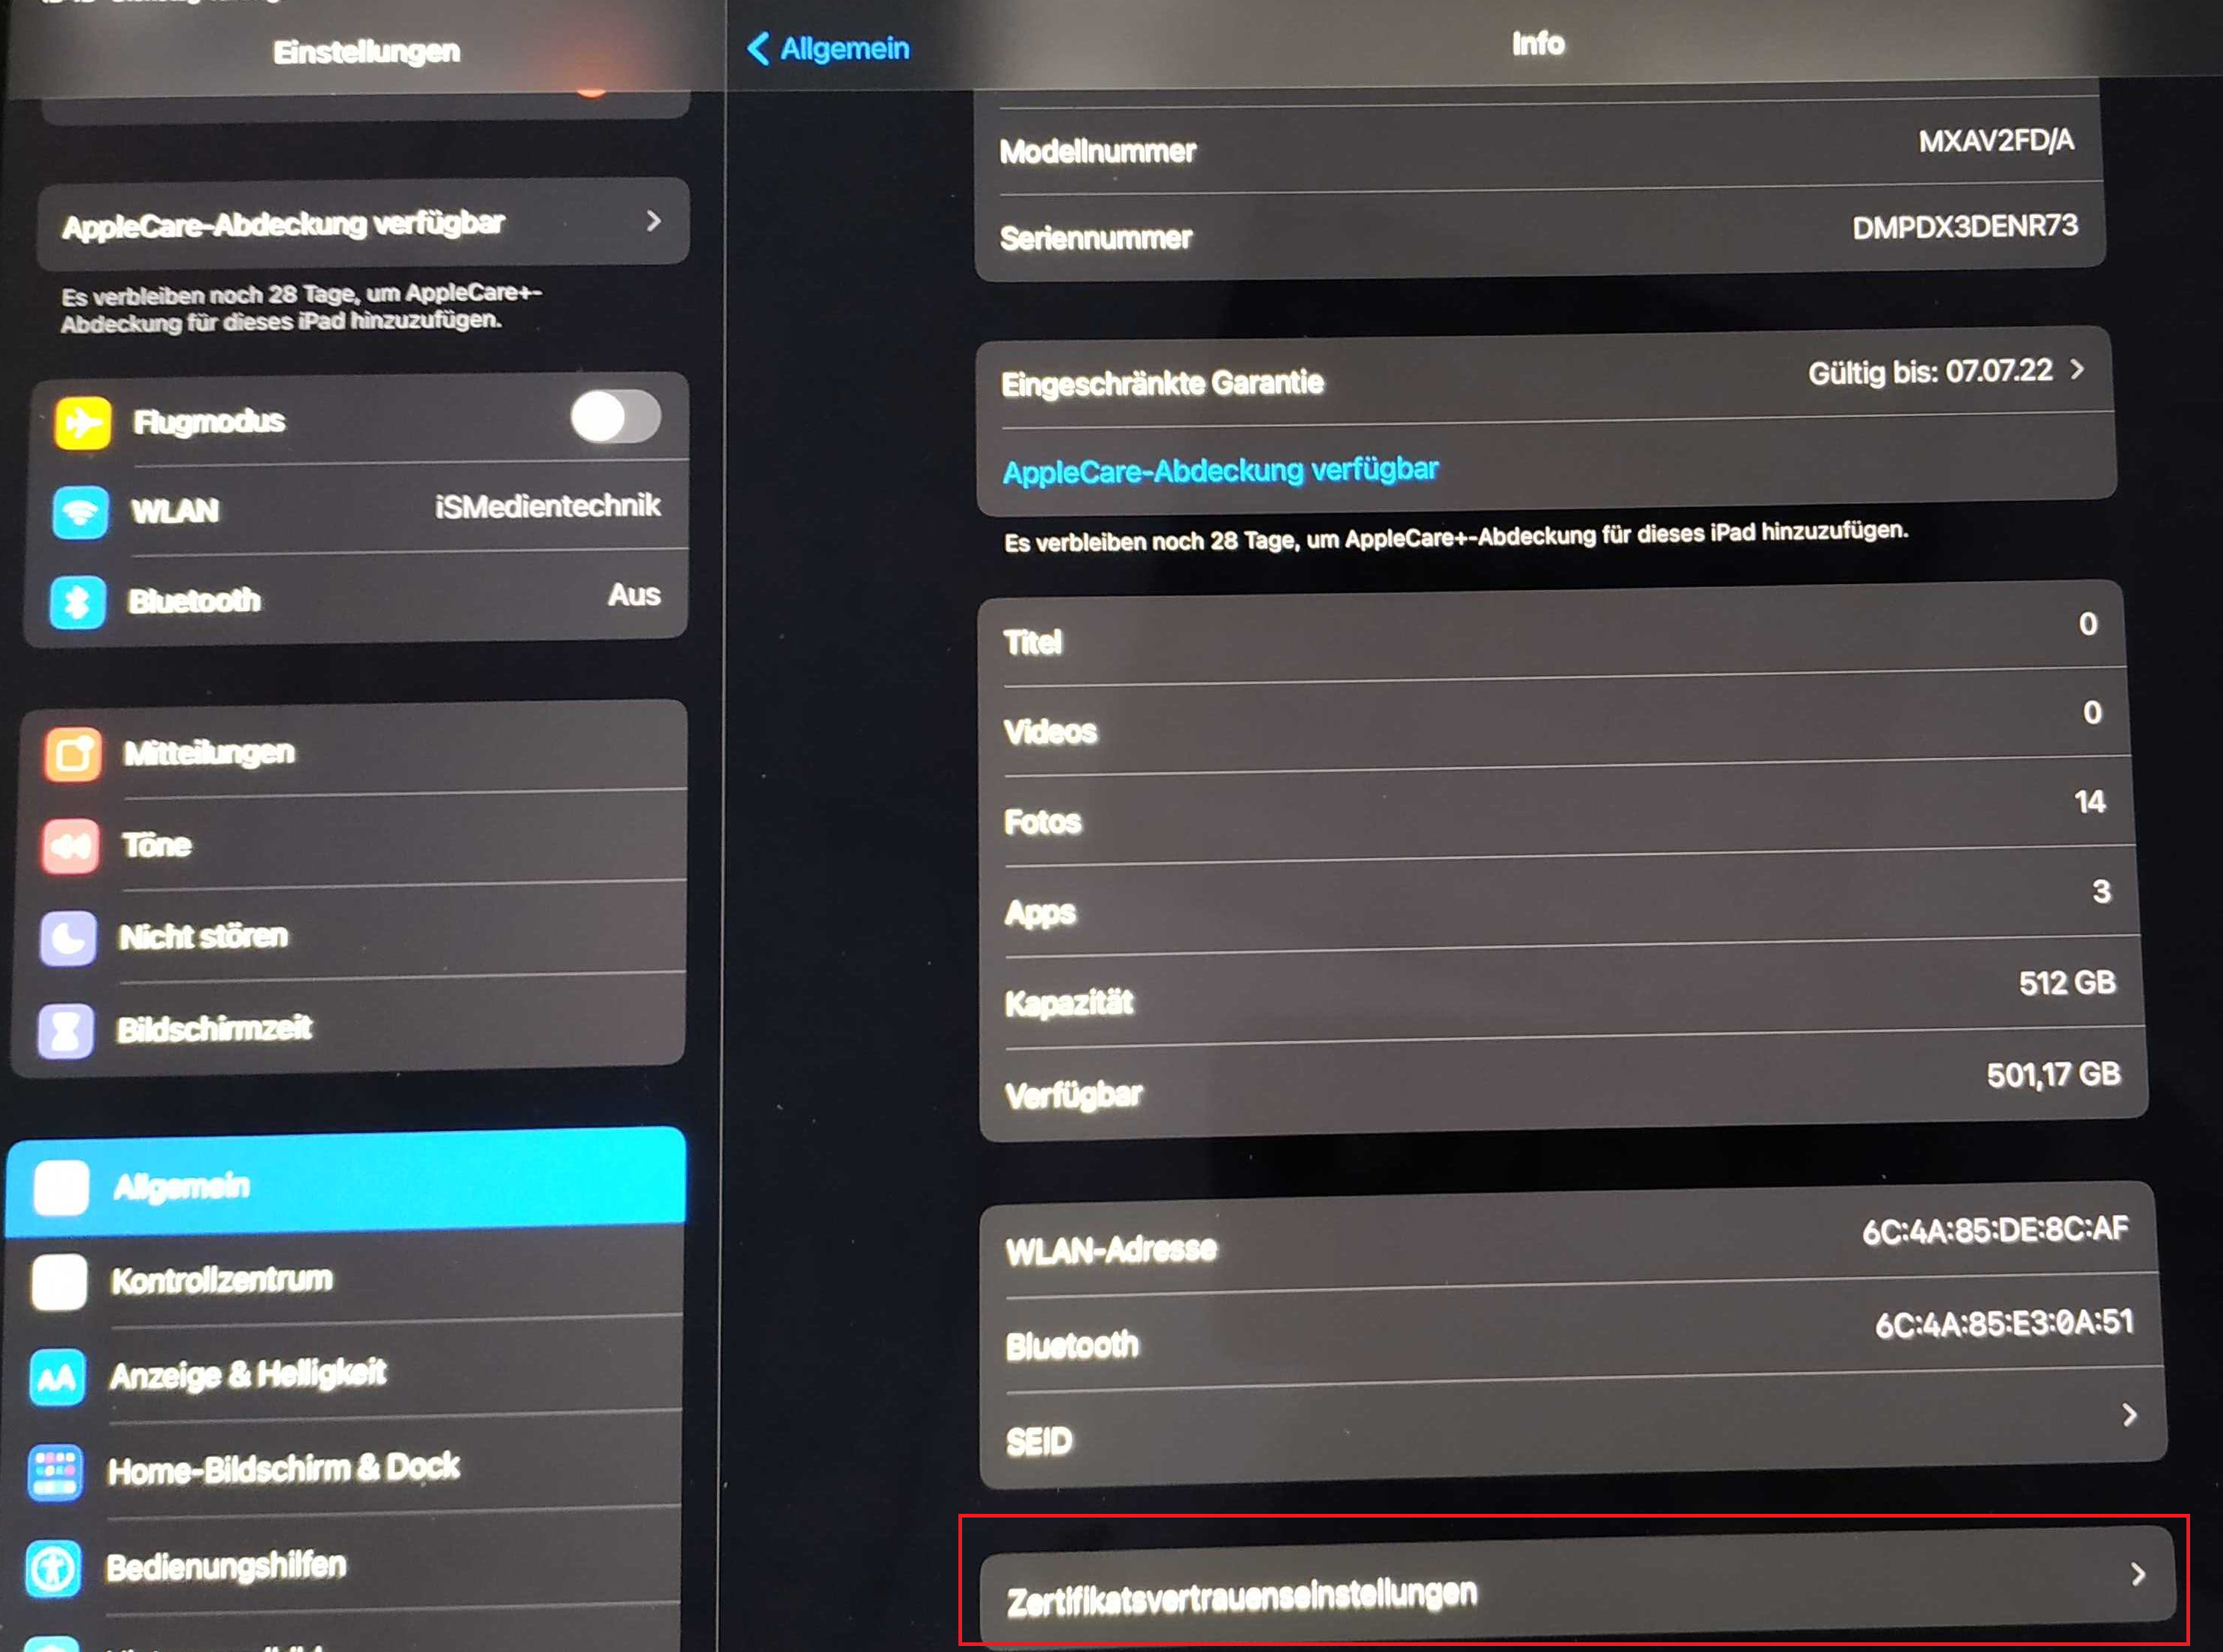
Settings > General > About > Certificate Trust Settings


Linux (Debian/Ubuntu)
Copy PEM files to /usr/local/share/ca-certificates (you still have to check whether .pem or .crt) and then integrate them into the system with sudo update-ca-certificates. This is needed for curl or Docker, for example.
However, these certificates are not used (or were not used - check again!) to access NeuroomNet. To do this, you can import the certificates in the browser settings in Chrome or Firefox (but also check out https://pingv.it/linux-system-zertifikate-mit-firefox-nutzen/)
Alternatively, user certificates for Chromium/Firefox can be installed using certutil from the libnss3-tools package:
certutil -d sql:$HOME/.pki/nssdb -A -t "TCu,Cu,Tu" -n isxs_local -i ca.crt
Android
Install certificate
- Open Settings on the device.
- Tap on Security & privacy>More security settings>Encryption & credentials.
- Tap on Install a certificate>Wi-Fi certificate.
- Tap on the three-line menu
.
- Select the location where you installed the certificate.
- Tap the file.
- Enter the key store password if required. Tap OK.
- Enter a name for the certificate.
- Tap OK.
Remove certificate
Important: Removing installed certificates does not remove the permanent system certificates that are required for your device to function properly. However, if you remove a certificate that is required for a specific WiFi connection, your device will no longer be able to connect to that WiFi.
- Open Settings on the device.
- Tap on Security & Privacy>More Security Settings>Encryption & Credentials.
- Under “Credential Store”:
- Delete all certificates: Tap Delete credentials>OK.
- Delete specific certificates: Tap **User Credentials>**Select the credentials you want to remove.