Tutorial Step 3: Displaying a Value
Now we want to display the variable value in a button and the background should change to green or red depending on the variable value. For this goal we create a button as follows:
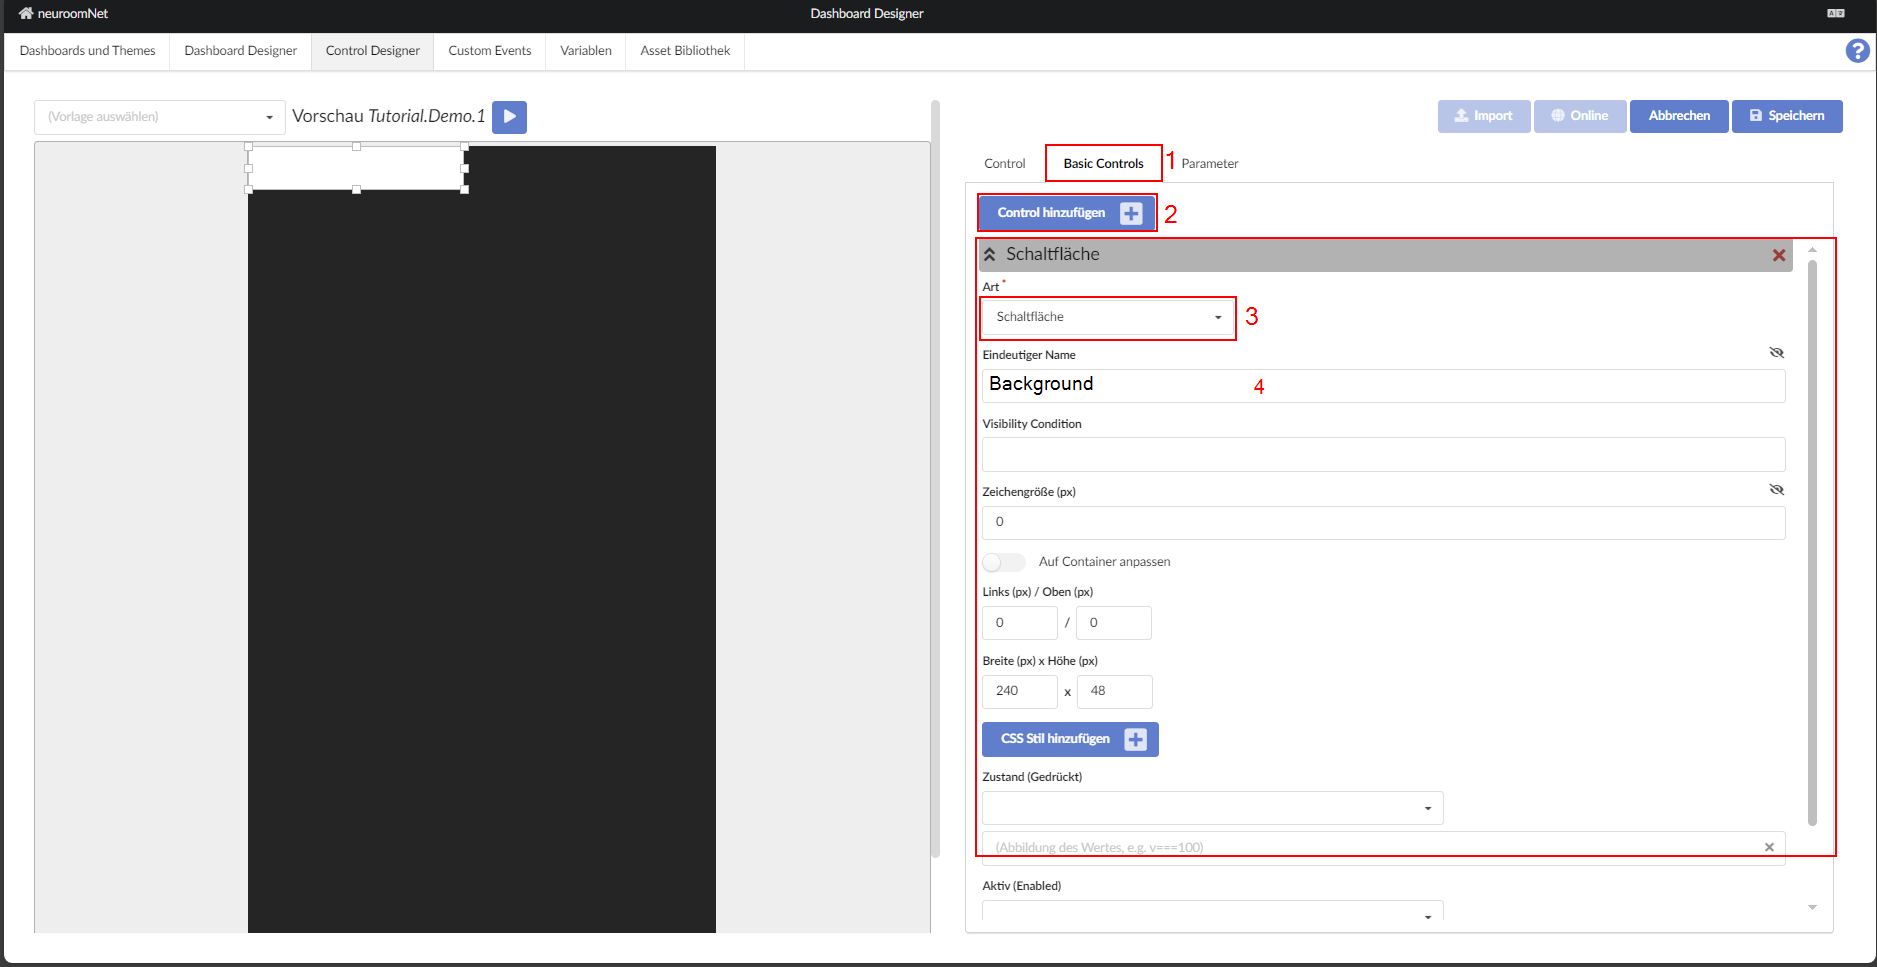
On the left, in the template preview, all building blocks of the template are shown at the chosen position in the configured size; the currently selected building block is subtly highlighted.
If the type of a building block is changed, all settings are completely reset. The building block appears at the top left of the template and its dimensions receive appropriate defaults for the type of building block.
The font size is always inherited from the template. For text building blocks like a formatted value here, the width is preset to ten times the font size, the height to 2.4 times — with inner and outer protection zones taken into account accordingly.
Note that the position (left and top) is always relative to the font size of the template, while the size (width and height) is relative to the font size of the building block. So if the font size of the building block is changed, its size scales accordingly, but the position remains fixed.
In addition to direct input of position and size, these can also be adjusted directly using the mouse in the template preview.
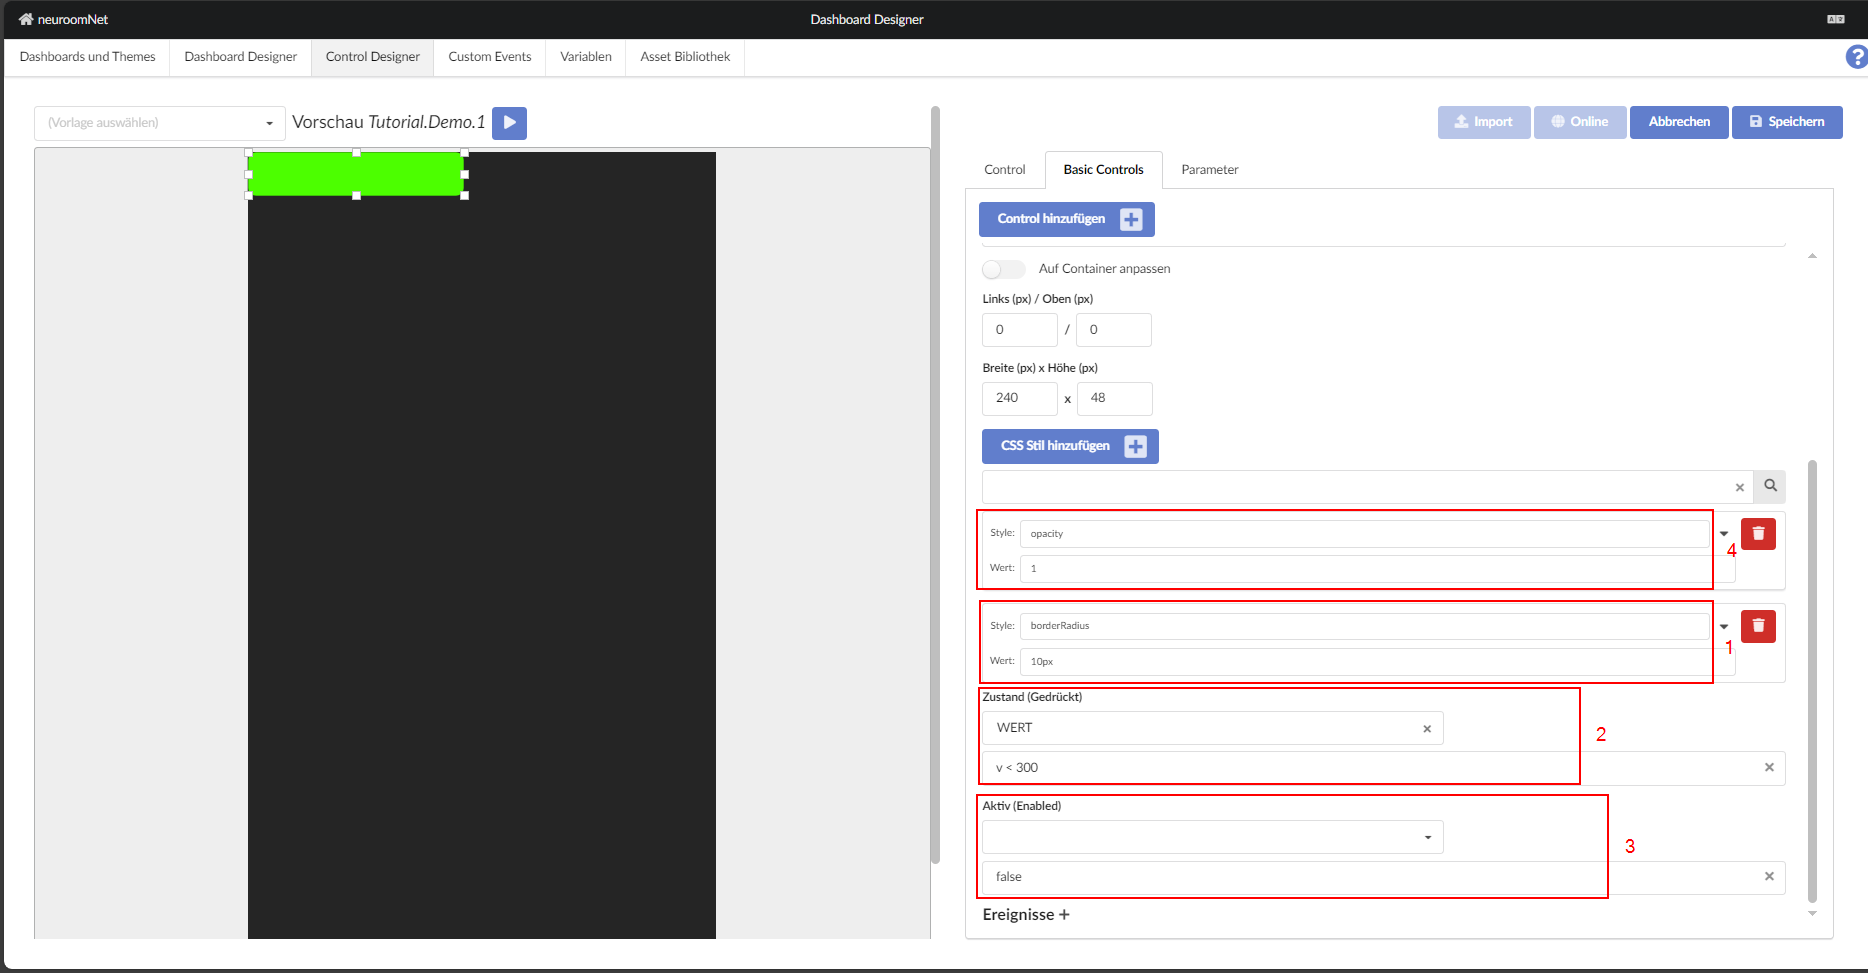
Format the Button
To round the corners, add a CSS style rule. Set the style to "borderRadius" and choose any value; for this tutorial we use "10px". Don't forget the "px" unit. This style can be applied to various elements (e.g. sliders, buttons, text buttons, etc.).
To set the colour of the button to depend on the value of the variable we created earlier (VALUE), we need to use a small JavaScript expression to specify the condition.
To specify which variable the button should refer to, we set the "State" to VALUE and in "Value mapping" enter the expression "v < 300", where v represents the value of our variable.
Now we set the "Value mapping" of "Active" to "false" so that the button cannot be clicked, because we are using the button as a background. This reduces the button's opacity to 50%, which we can compensate for by adding a new CSS style "opacity" and setting its value to 1.
To display the variable value, add a new control — click "Add control" and select "Value" as the type and enter a unique name.
The parameter of the template can now be used as the label of the formatted text:
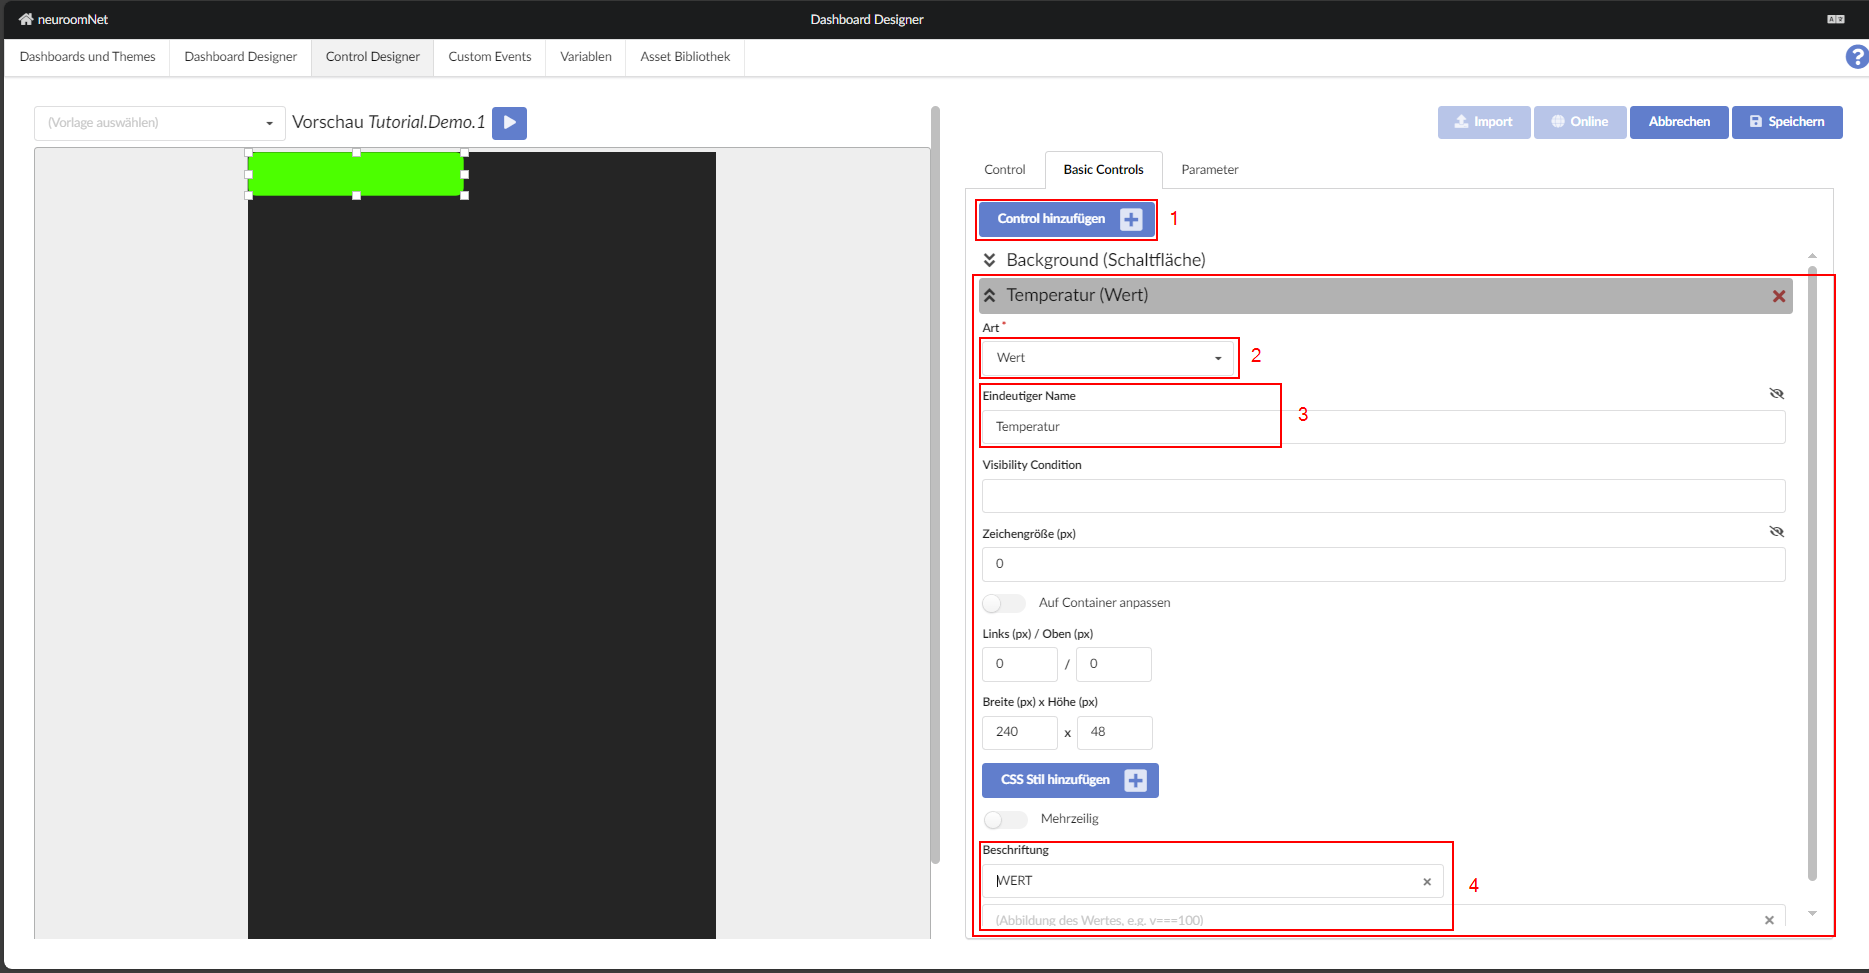
If the variable behind the parameter VALUE (Tutorial.GanzeZahl.01) had a value, it would now be visible (you could also directly set a value when creating the variable, see Step 2). Since the value does not yet exist (NULL), no value is displayed yet.
Next: Changing a Value